Dieser Artikel bezieht sich auf das Produkt Professional Email (powered by Titan). Wenn Sie ein Professional Email Indiviudal oder Teams nutzen bzw. ein Microsoft 365, gehen Sie bitte auf unsere FAQ Startseite https://www.hosteurope.de/faq/ und wählen Sie dort den richtigen Produktbereich Professional Email oder Microsoft 365 aus. Dort finden Sie die passenden Informationen.
In diesem Artikel finden Sie Informationen wie man ein Professional E-Mail Konto in der GMail App auf einem Android Gerät einrichten kann.
Einrichtung in GMail App für Android
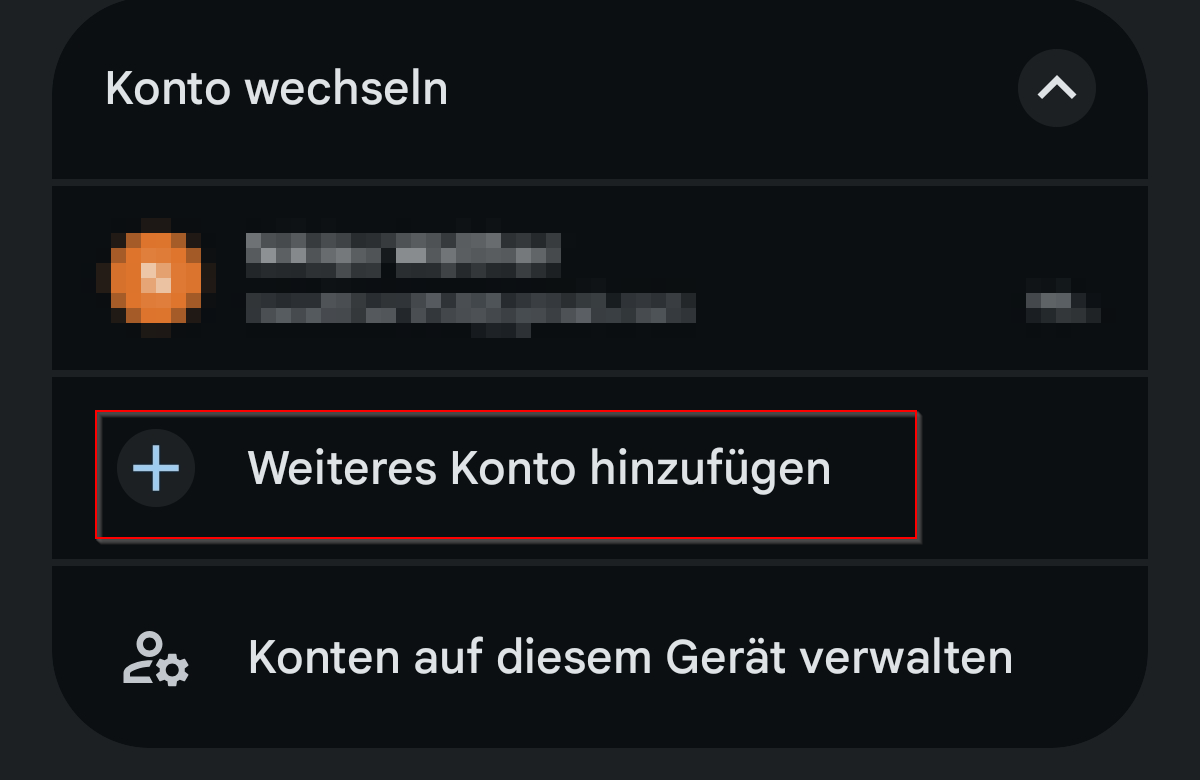
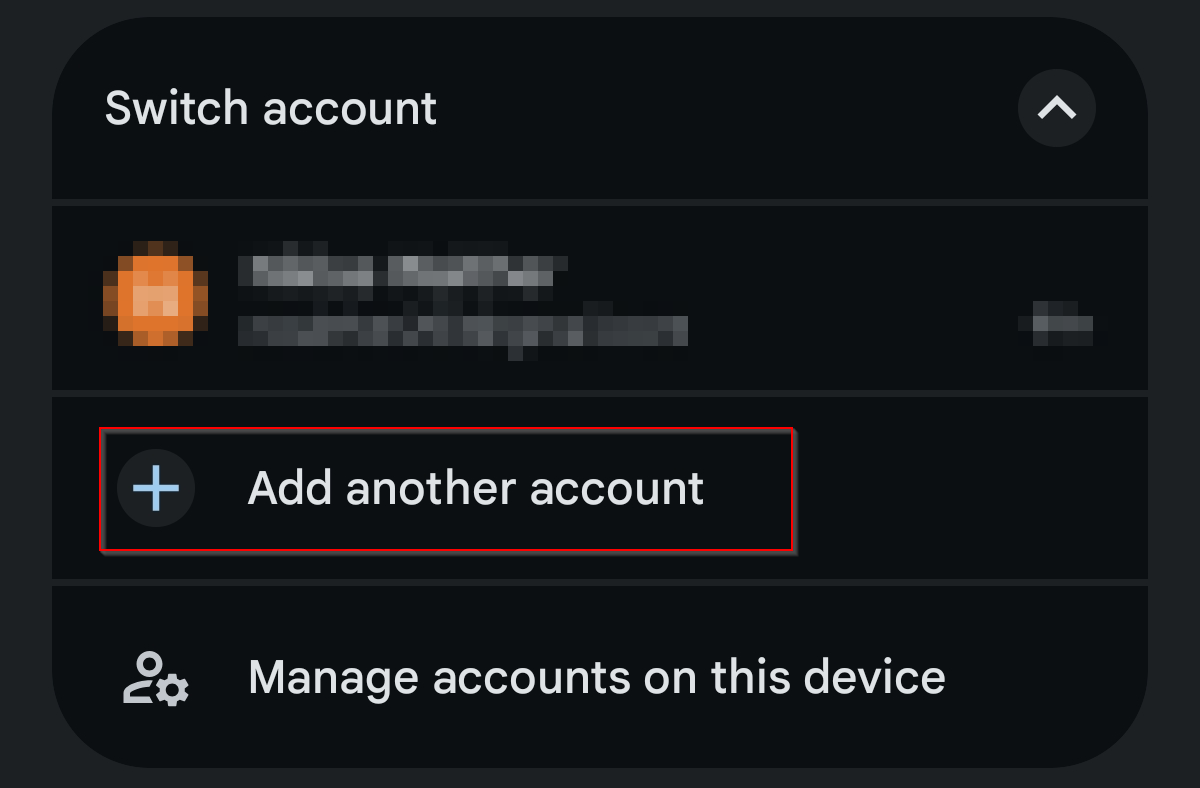
Klicken Sie zuerst in Ihrer GMail App oben rechts auf Ihr Profilbild.
Nun können Sie ein Weiteres Konto hinzufügen
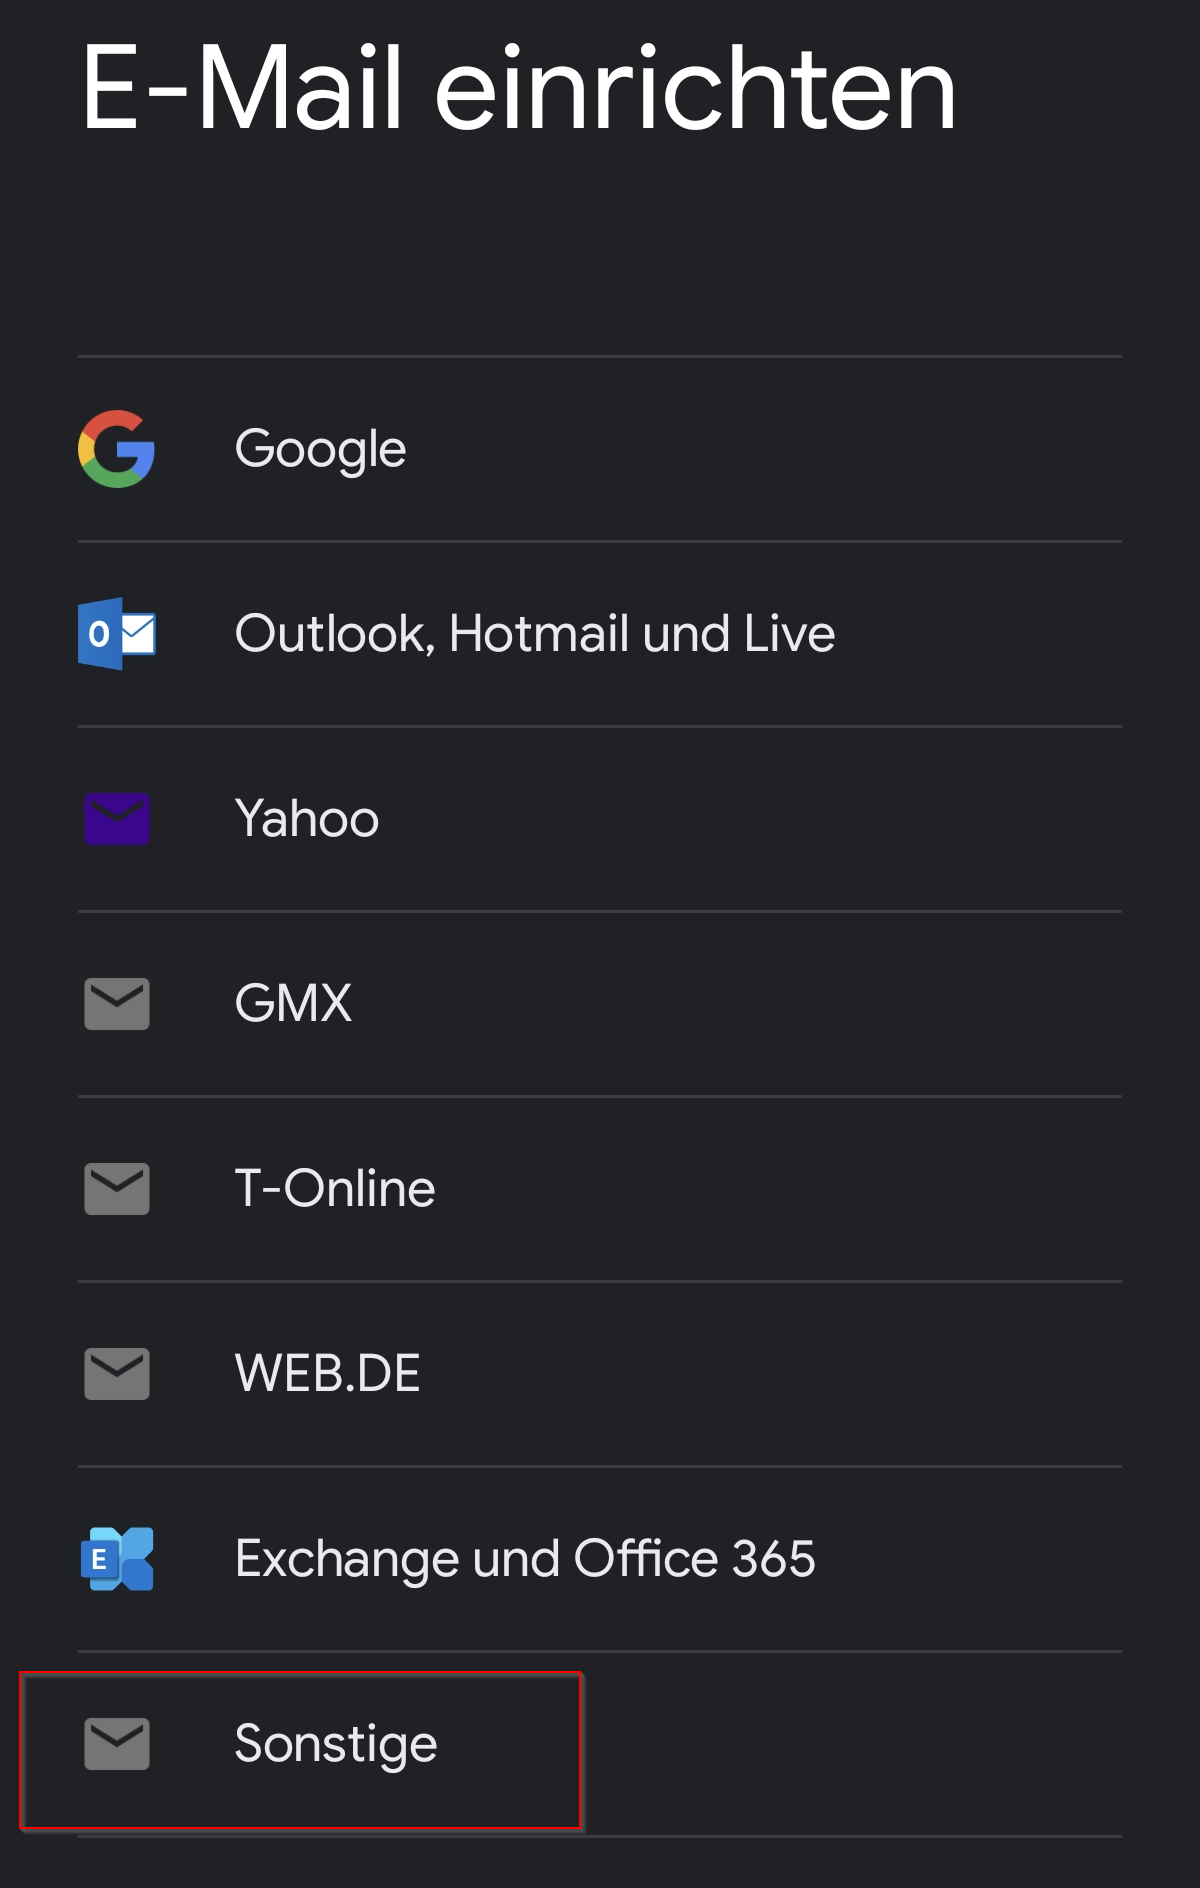
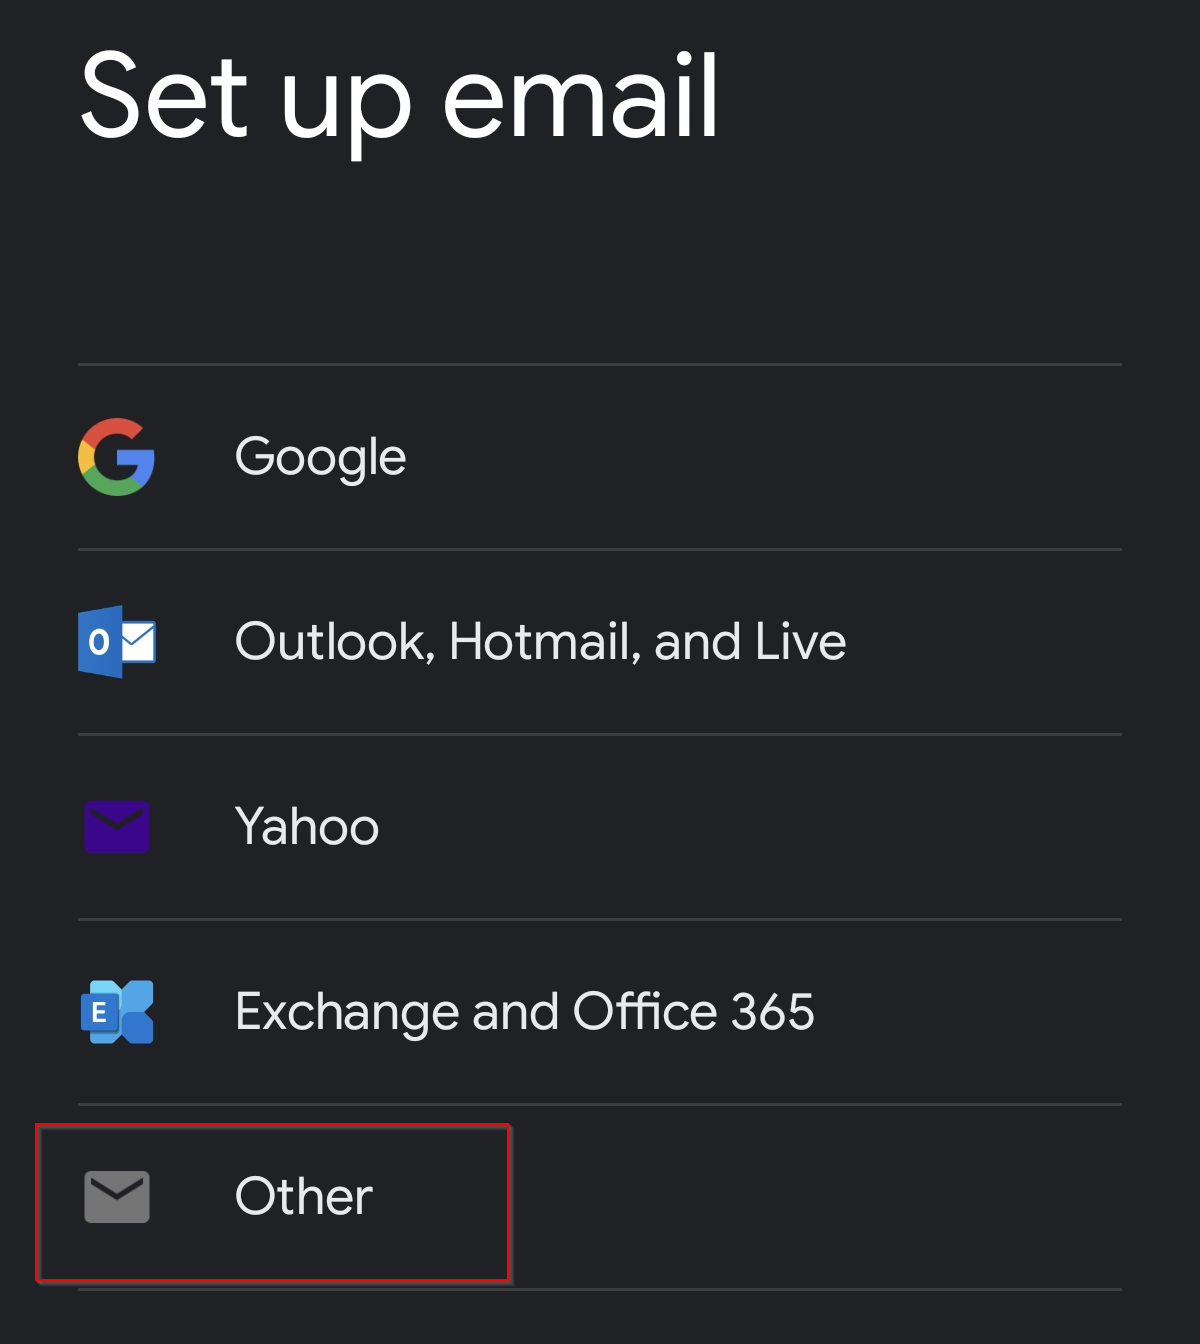
Wählen Sie im nächsten Fenster Sonstige
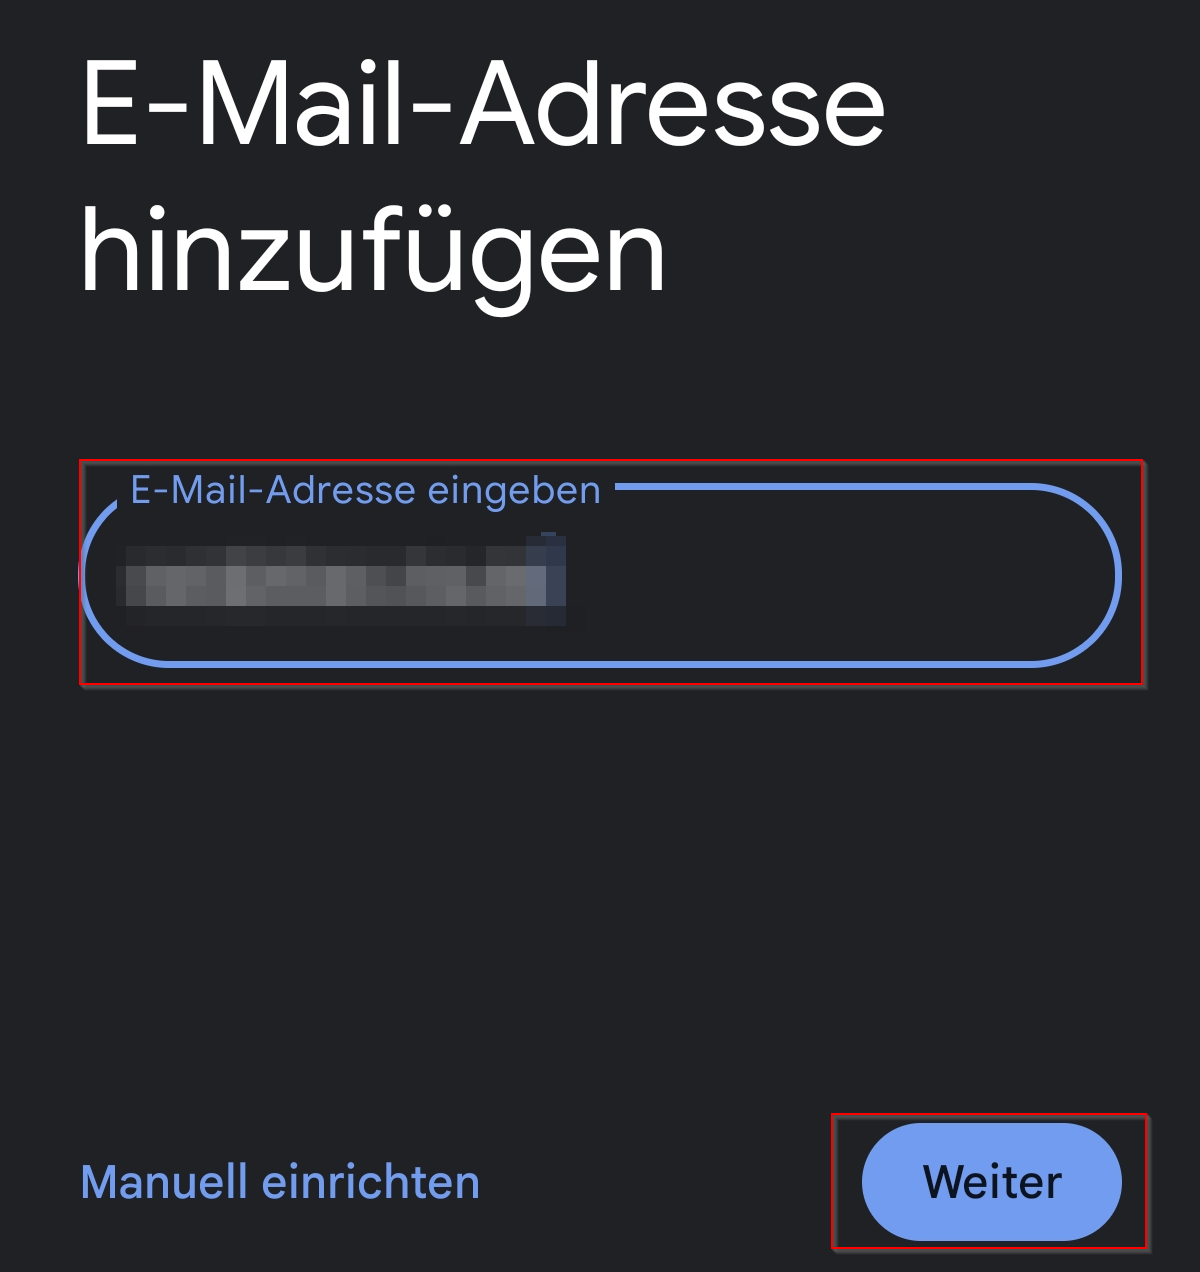
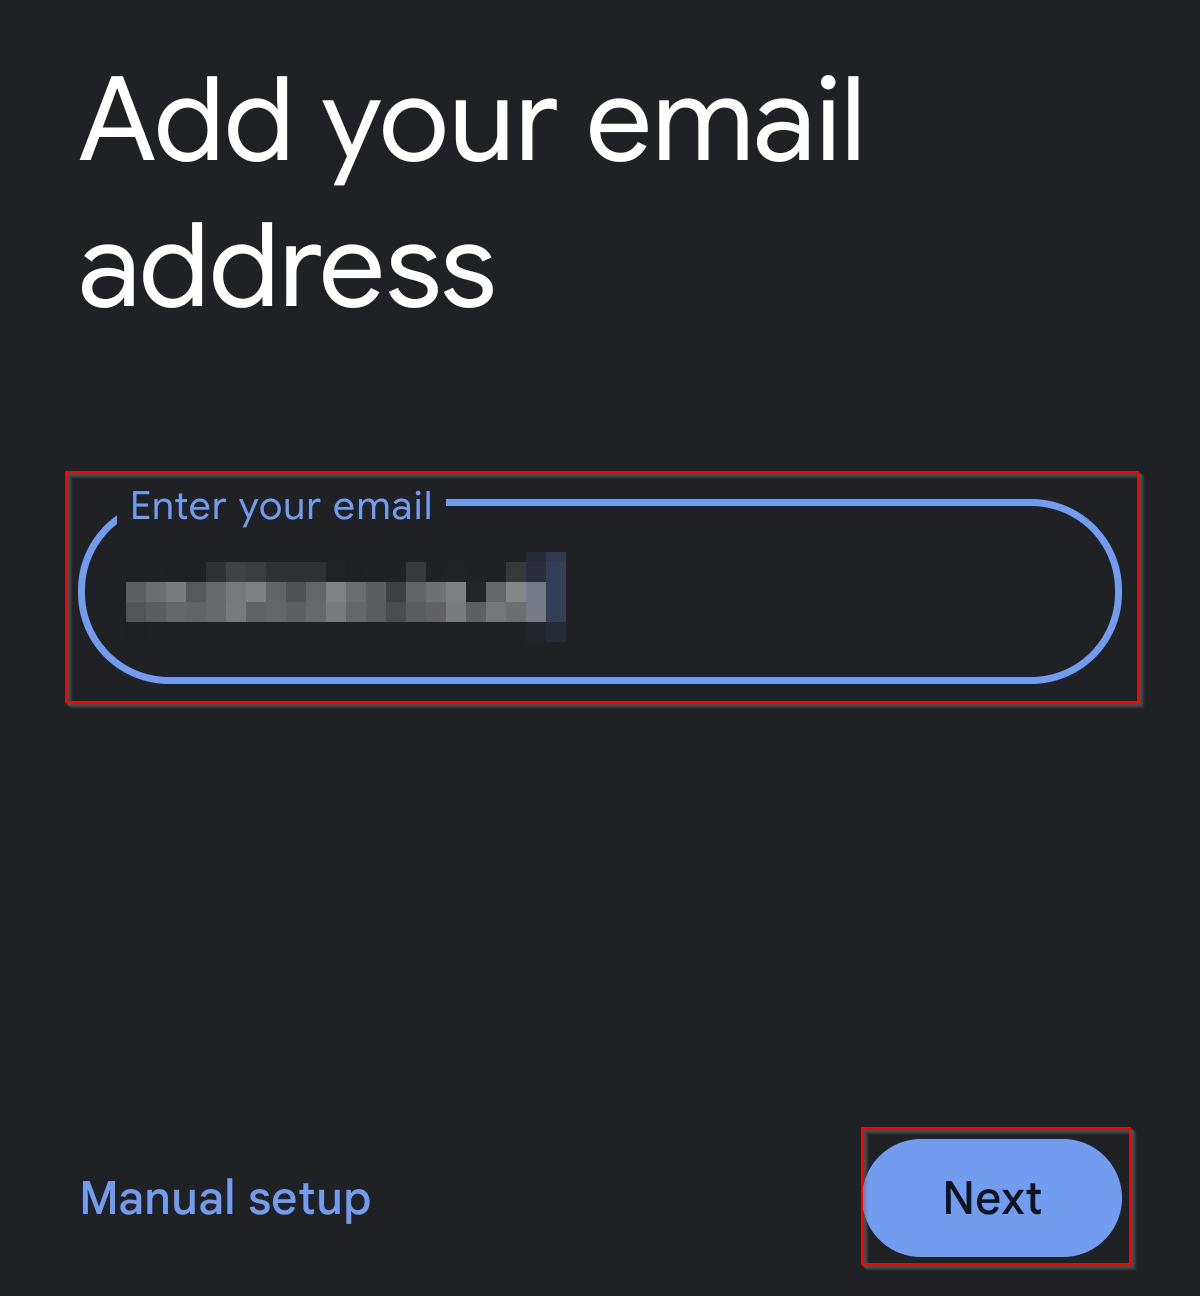
Nun können Sie Ihre E-Mail Adresse eintragen. Klicken Sie anschließend auf Weiter.
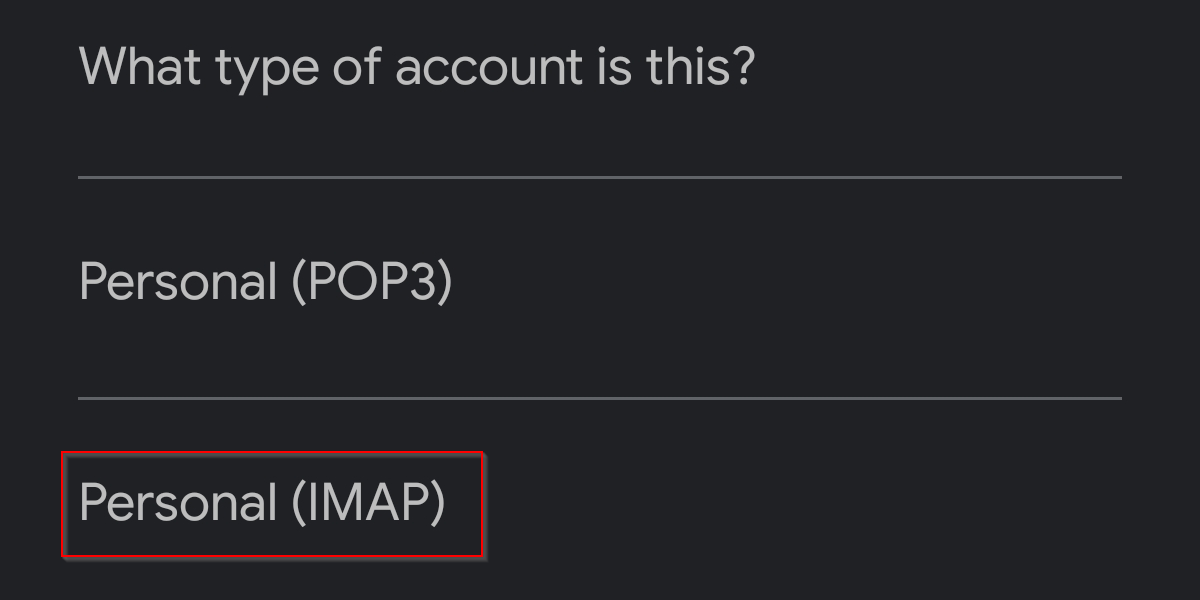
Als Kontotyp wählen Sie IMAP.

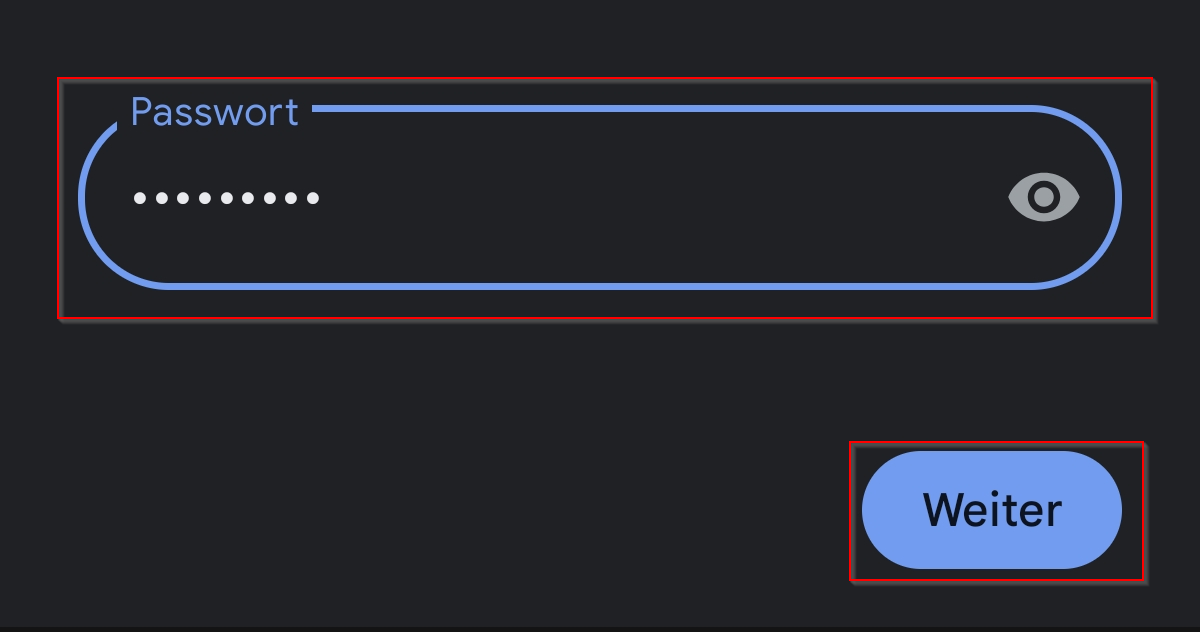
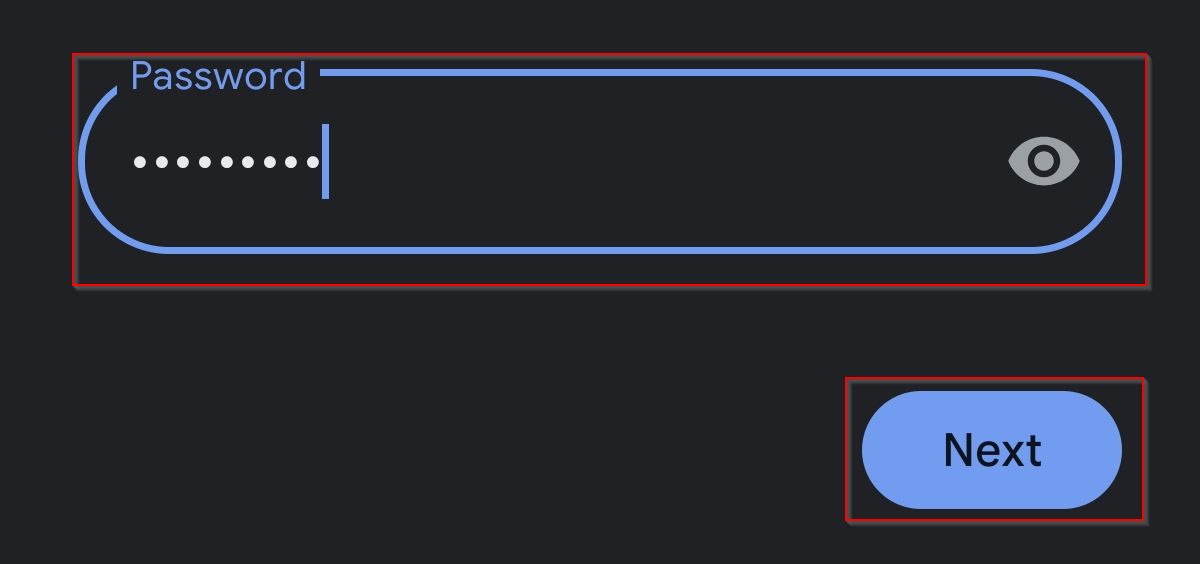
Nun können Sie das E-Mail Passwort eingeben. Klicken Sie anschließend auf Weiter.
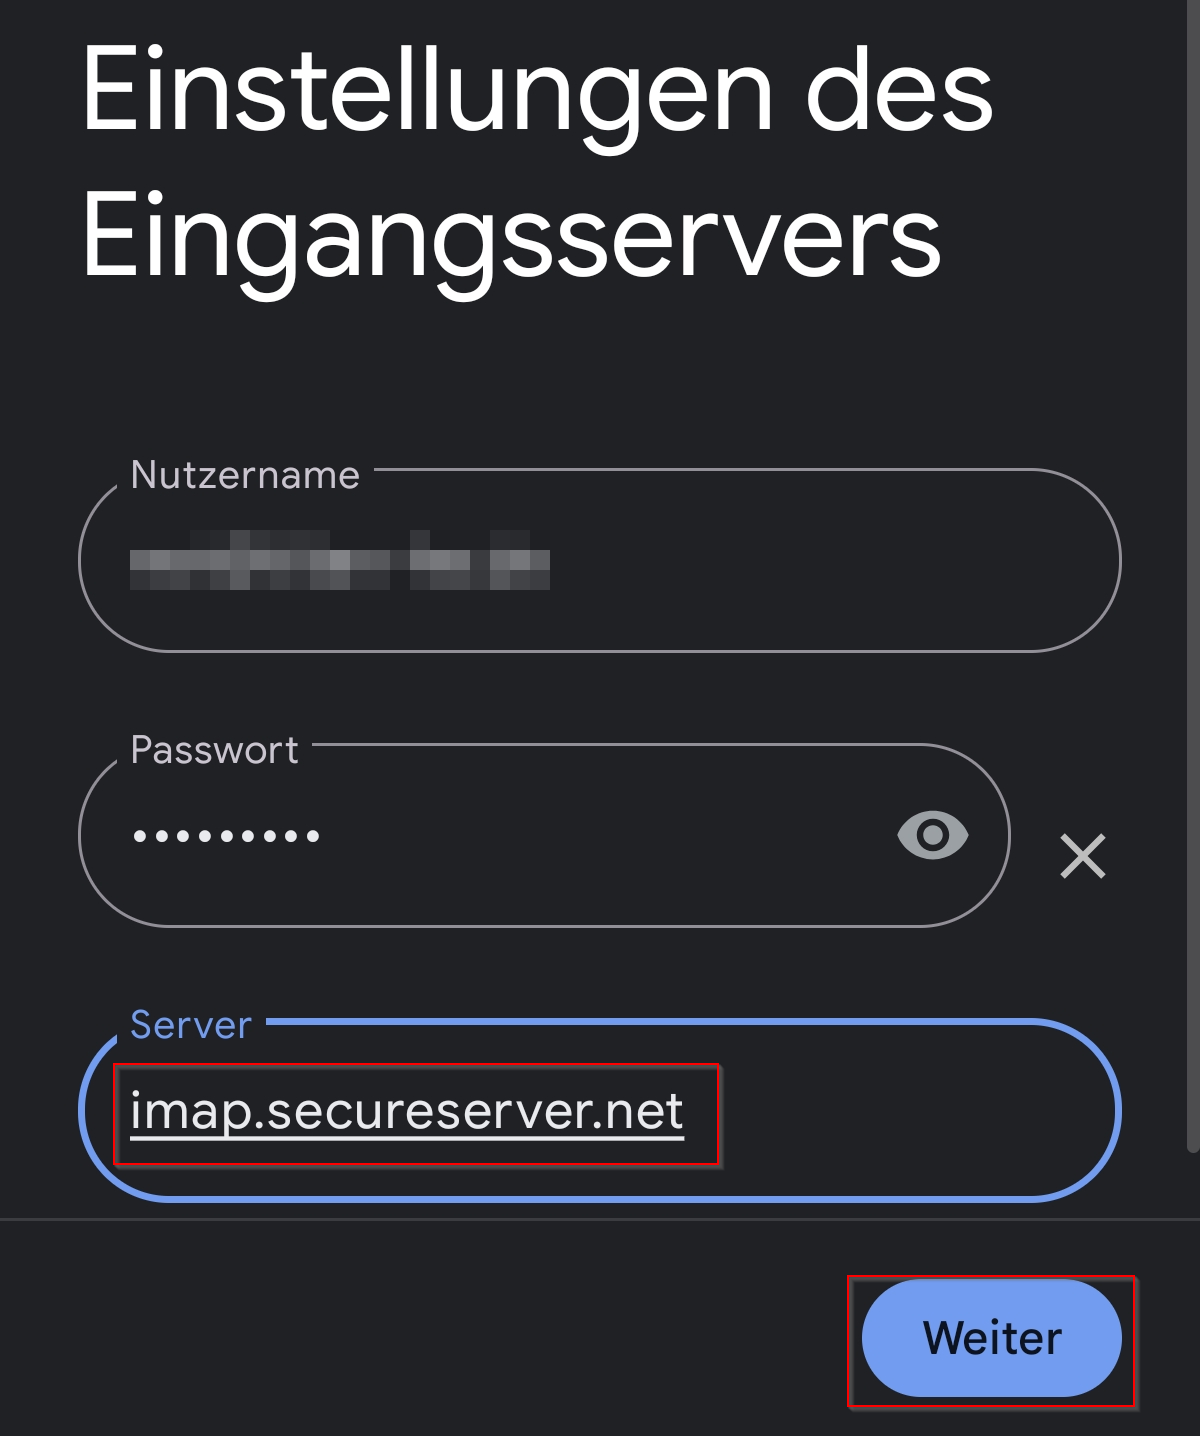
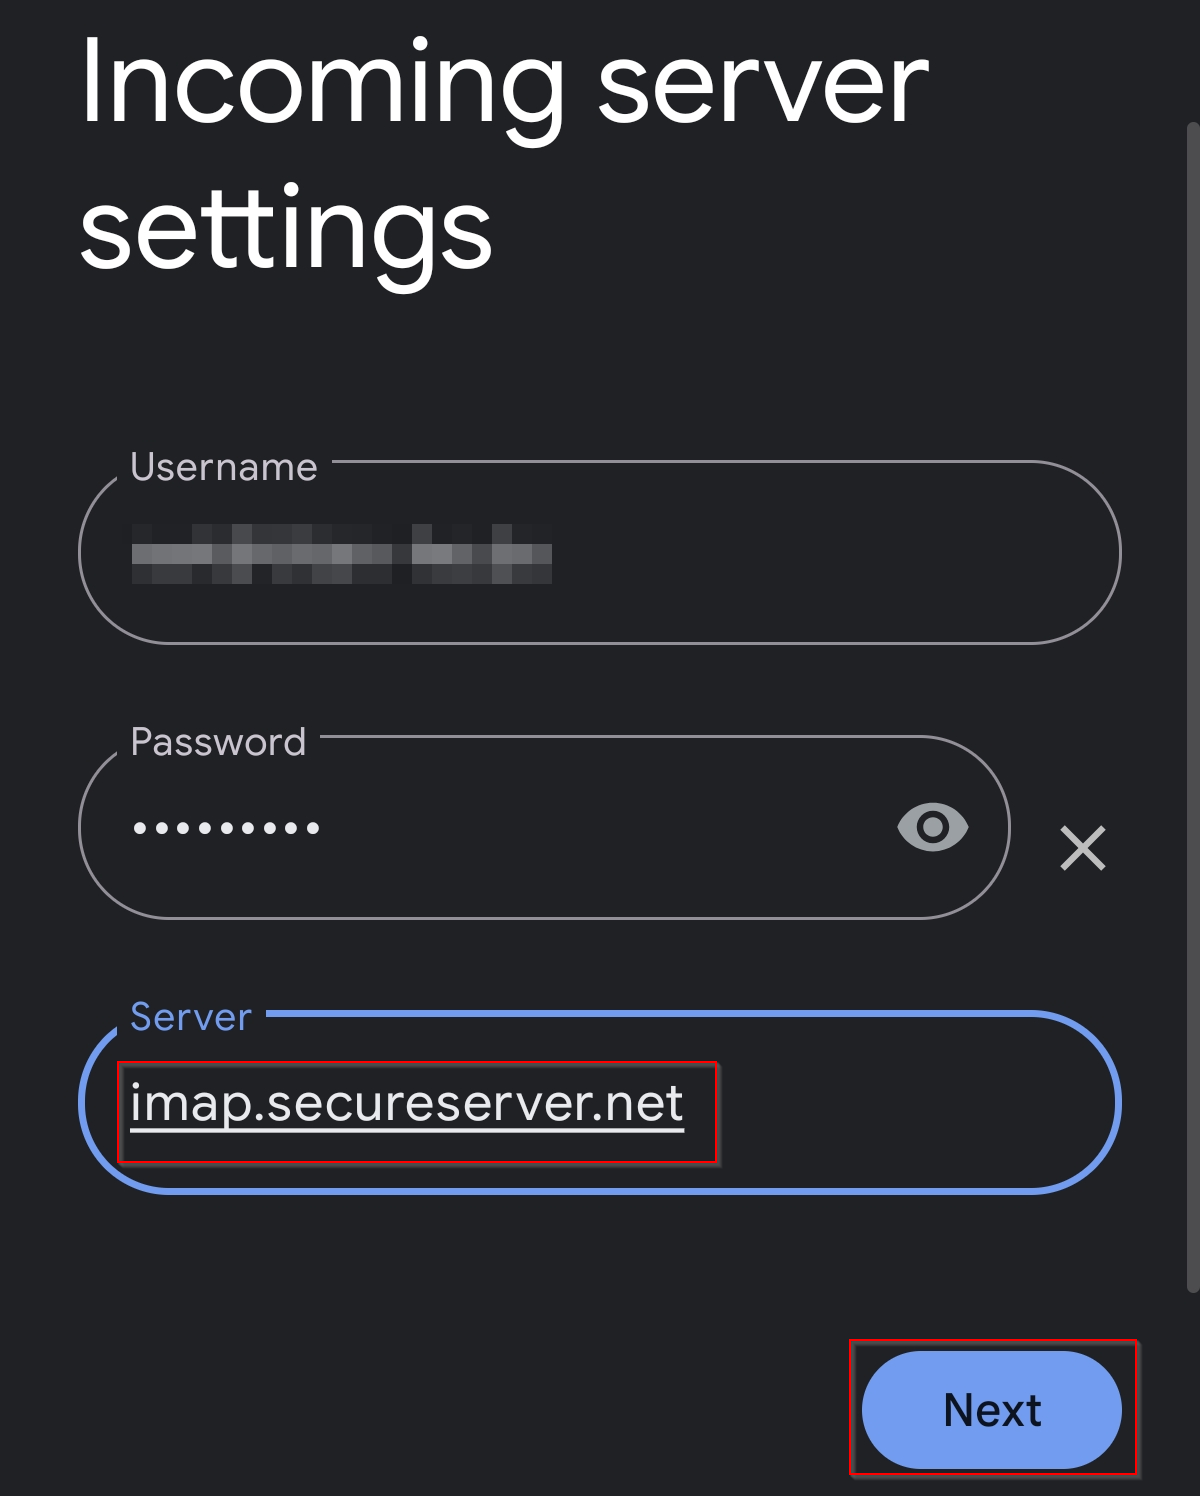
Tragen Sie als Eingangsserver Adresse nun imap.secureserver.net ein. Klicken Sie anschließend auf Weiter.
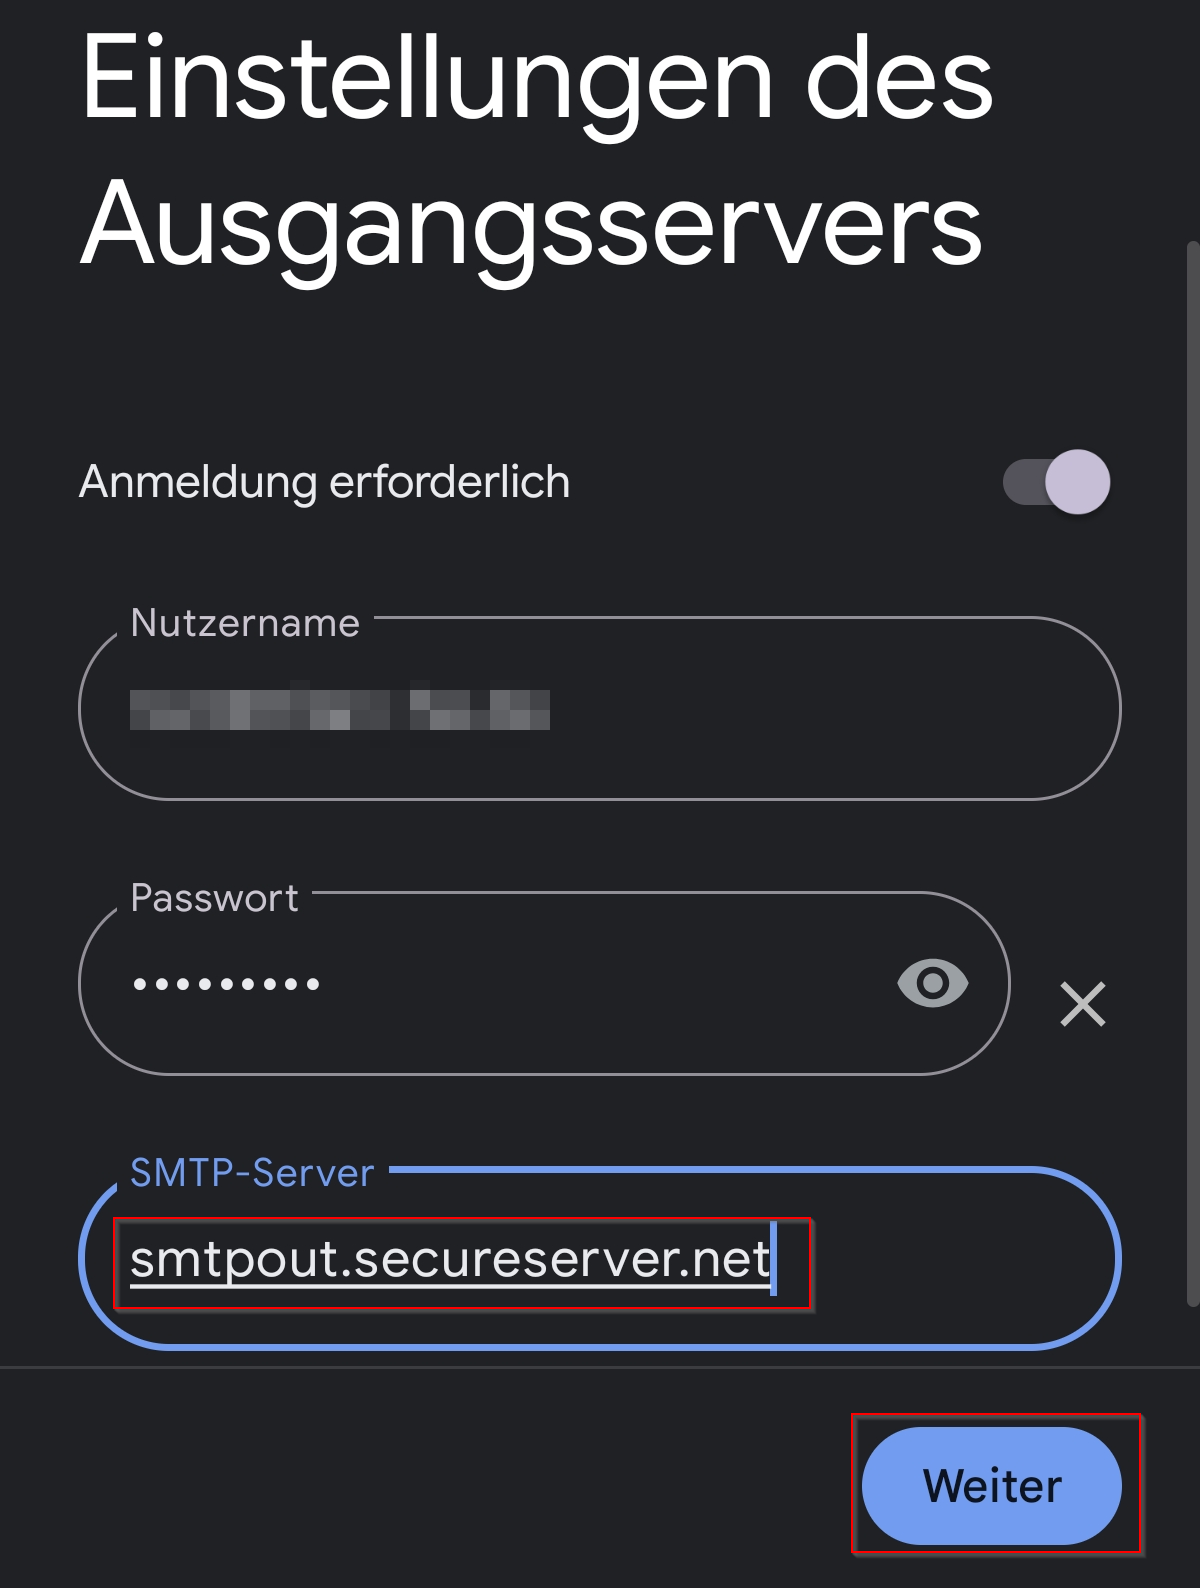
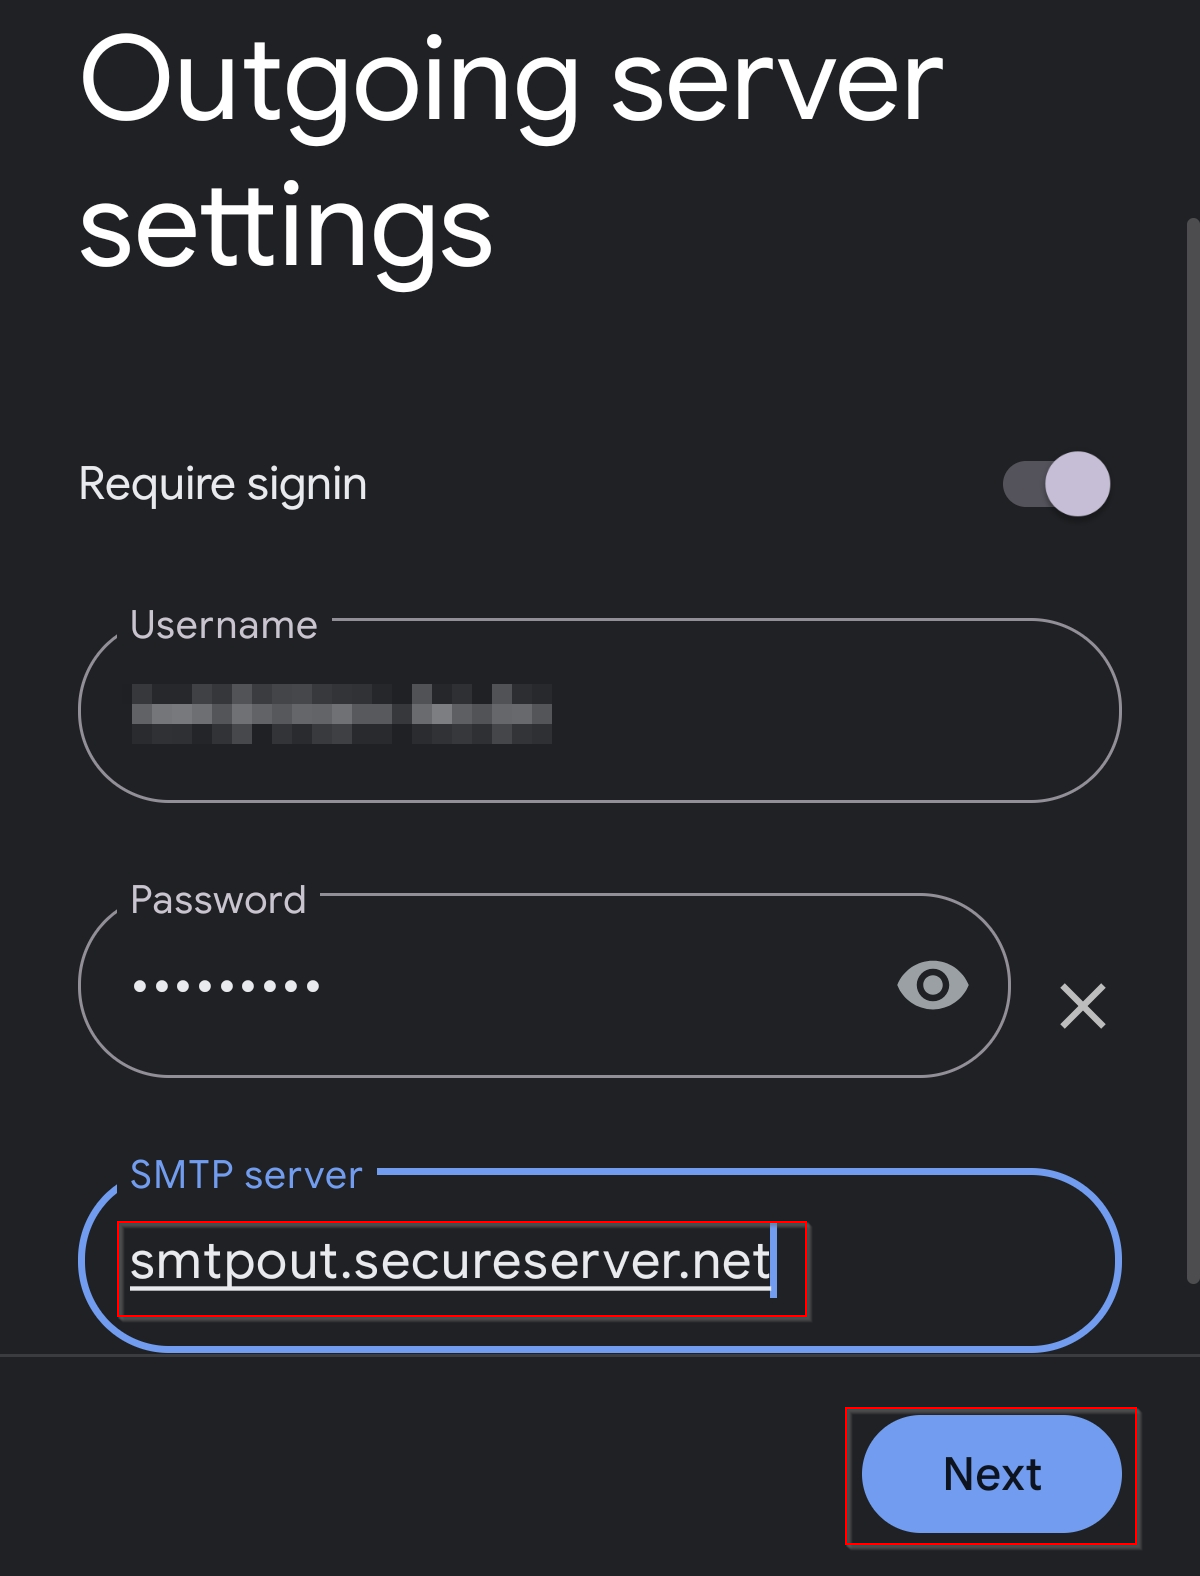
Tragen Sie als Ausgangsserver Adresse nun smtpout.secureserver.net ein. Klicken Sie anschließend auf Weiter.
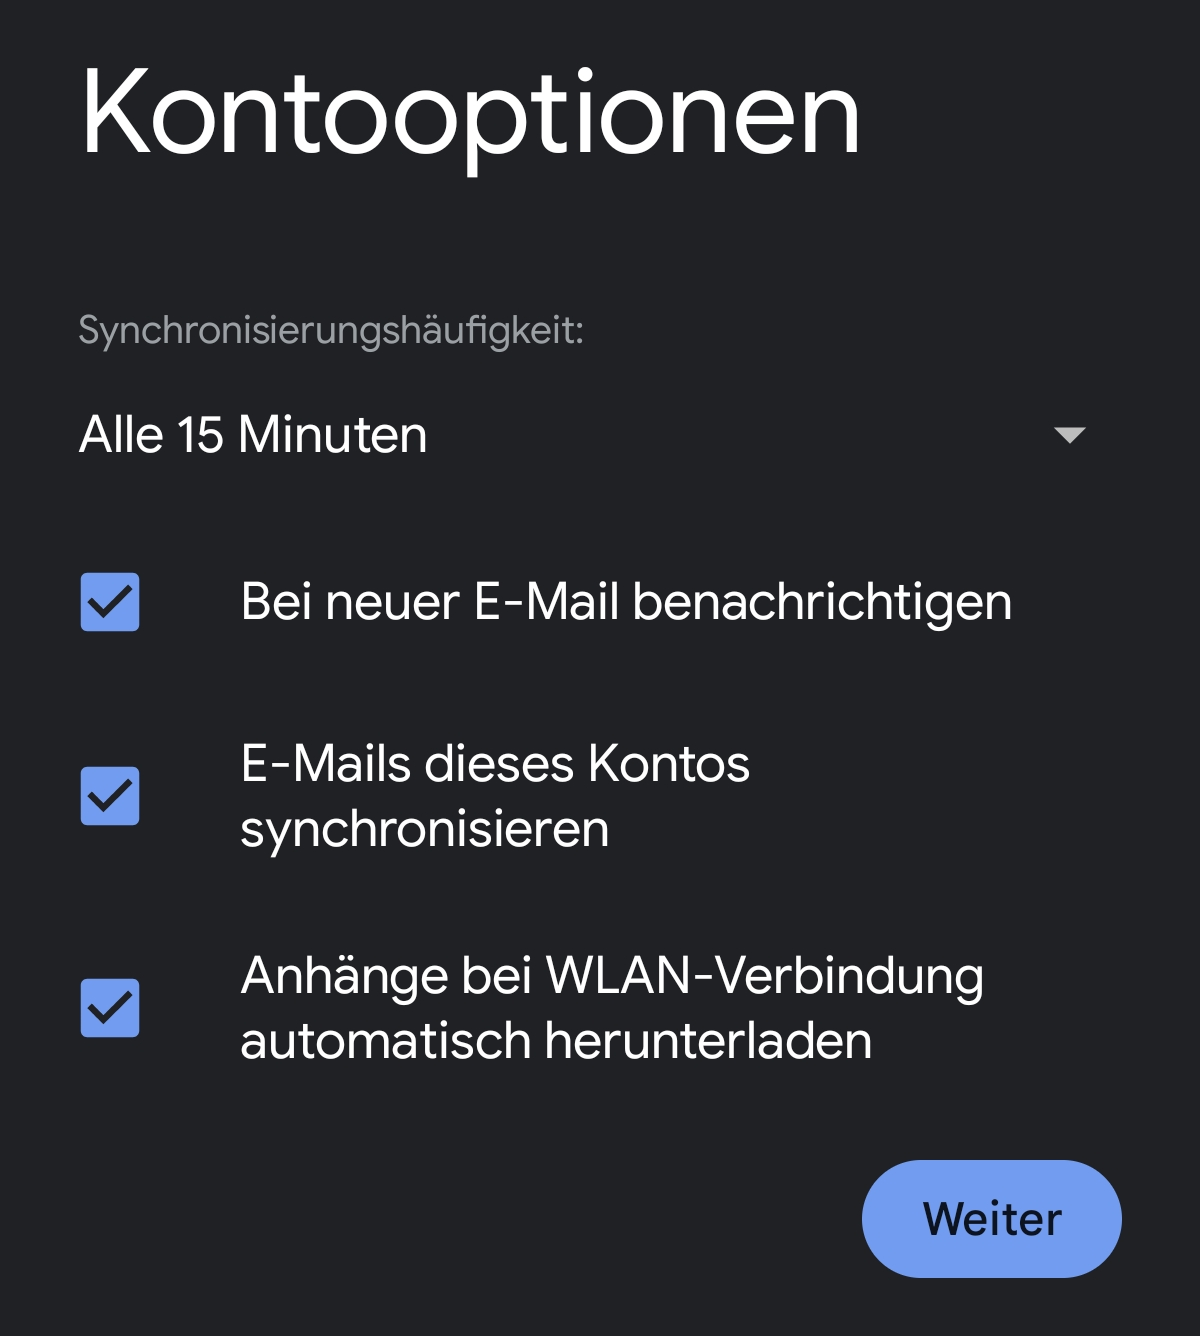
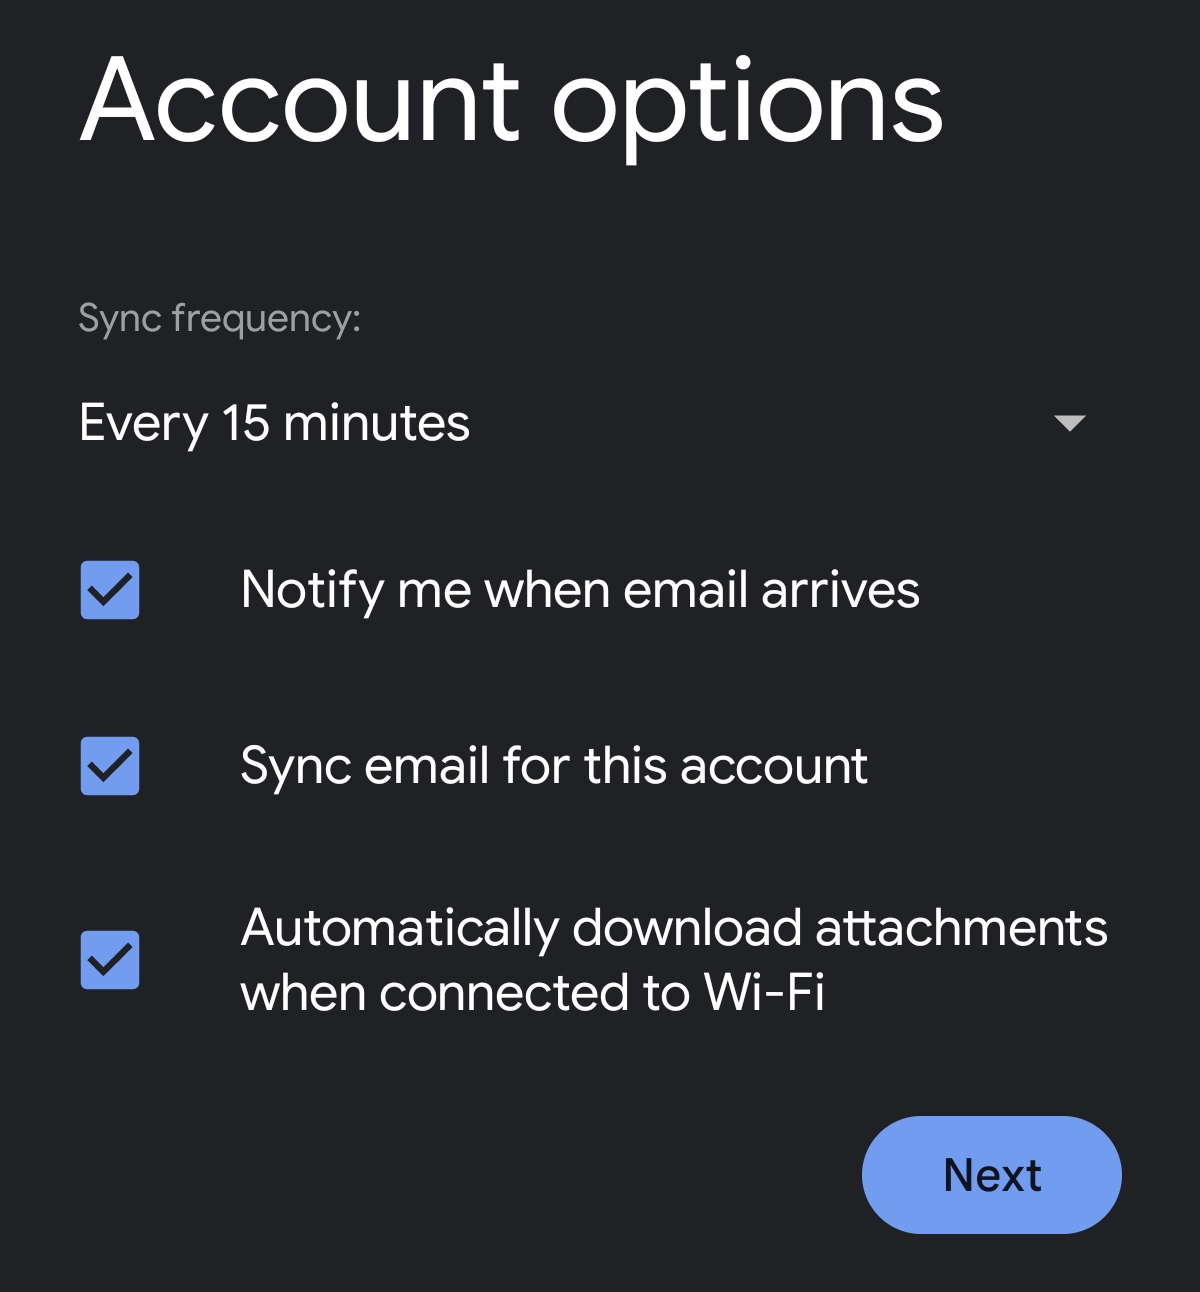
Die Kontooptionen können Sie bei Bedarf anpassen oder Sie klicken einfach auf Weiter.
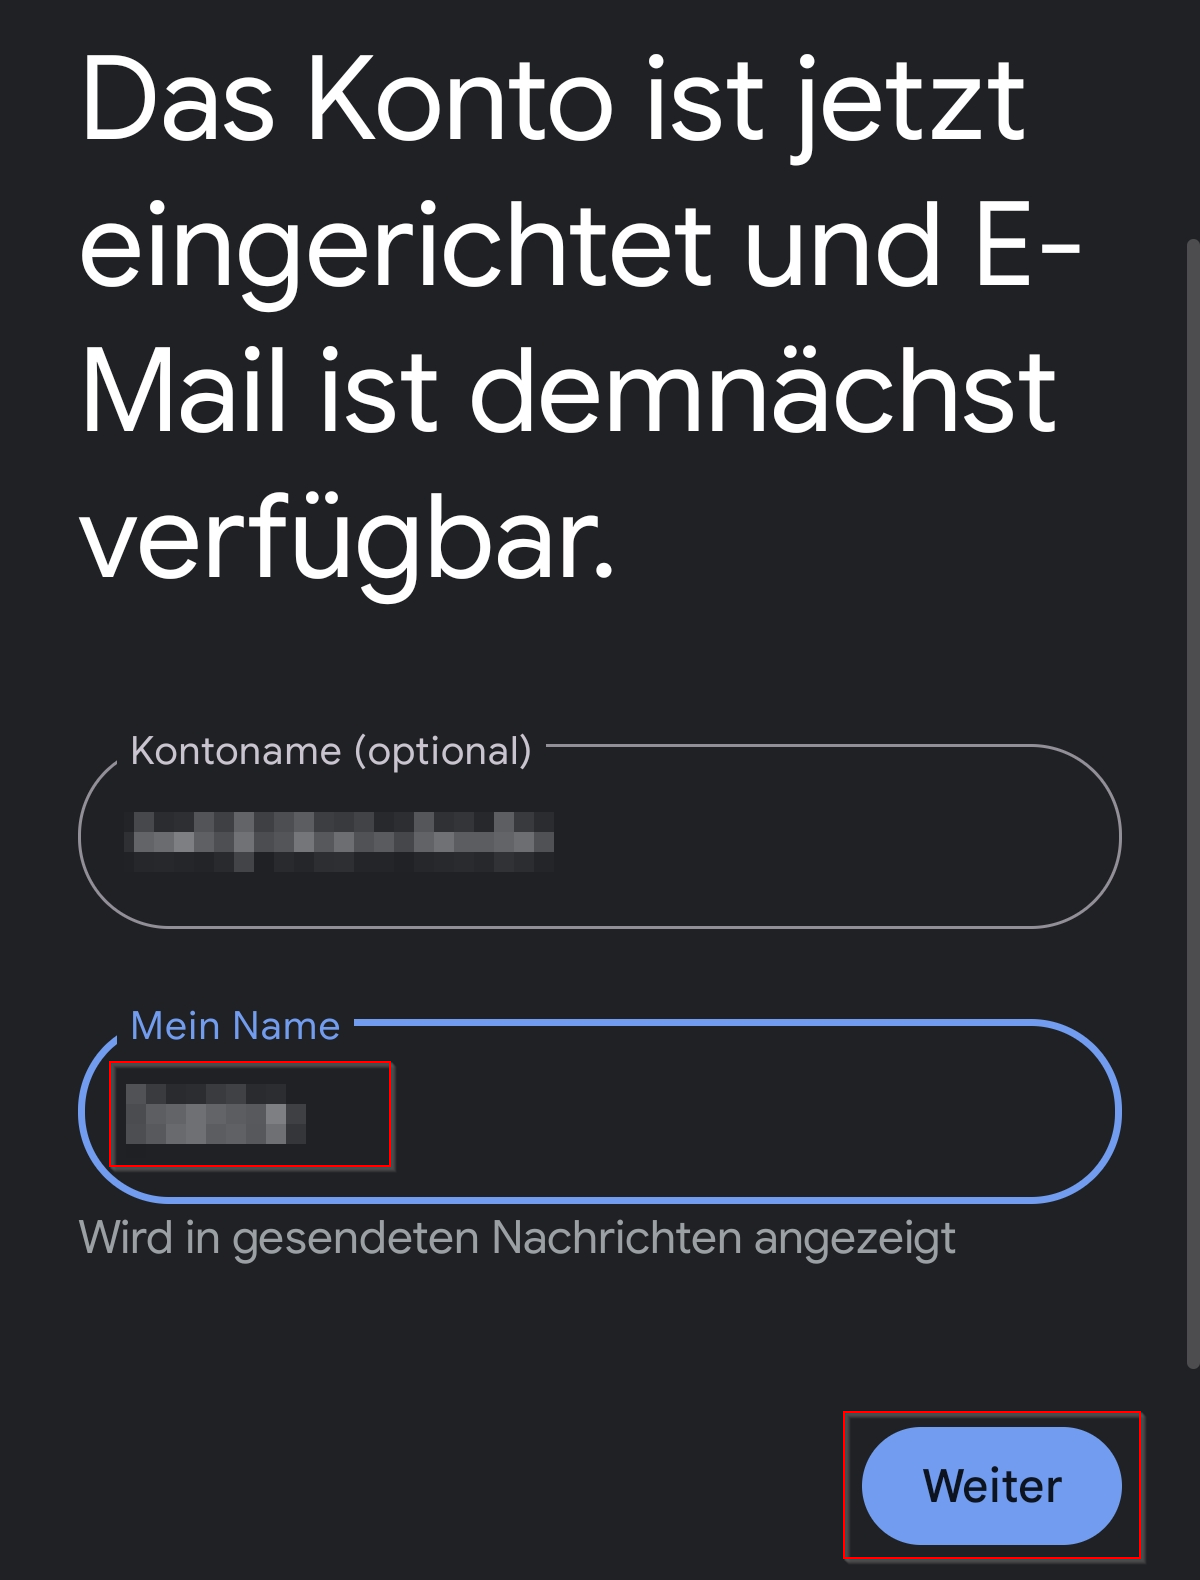
Das Konto ist nun eingerichtet.
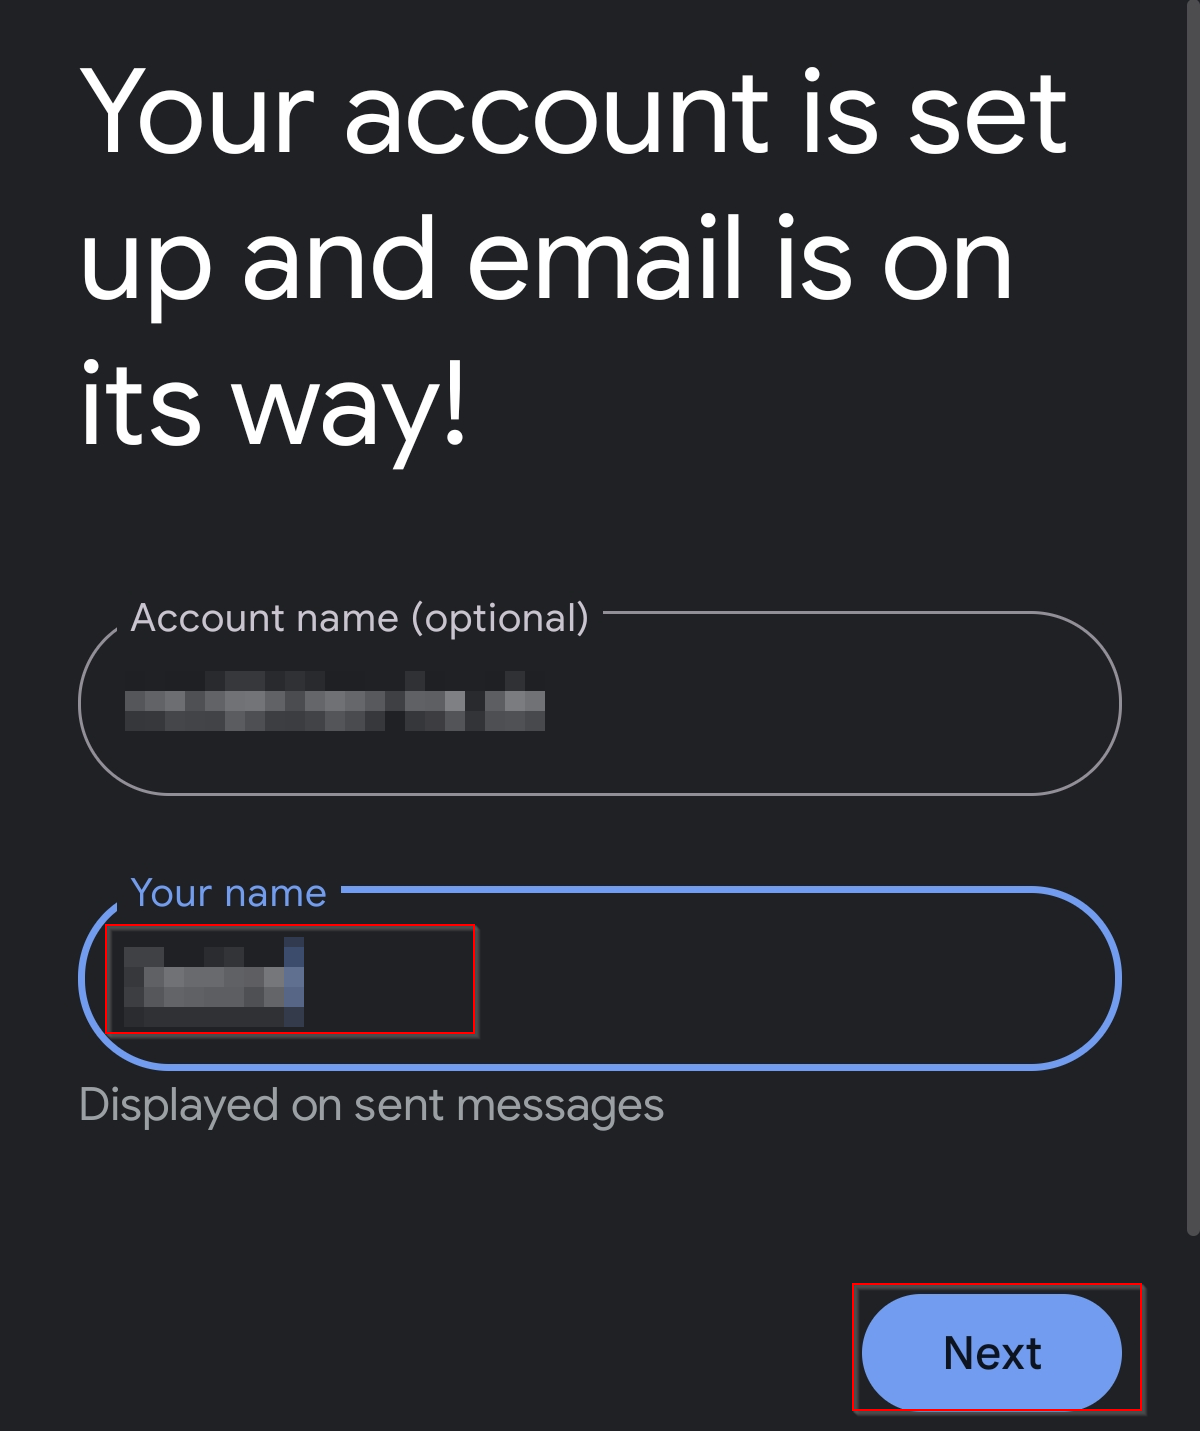
Im letzten Schritt können Sie unter Mein Name festlegen, welcher Name in gesendeten Nachrichten angezeigt wird.
Klicken Sie abschließend auf Weiter
English Version:
How can I set up my Professional Email (powered by Titan) in my Android gmail app?
This article refers to the Professional Email product (powered by Titan). If you use Professional Email Individual or Teams or Microsoft 365, please go to our FAQ homepage https://www.hosteurope.de/faq/ and select the correct product area, Professional Email or Microsoft 365. There you will find the relevant information.
In this article you can find information how to setup a professional e-mail account in the gmail app on an android device.
Setting up in GMail App for Android
First, tap your profile picture in the top right corner of your Gmail app.
You can now Add another account.
In the next window, select Other.
You can now enter your email address. Then click Next.
Select IMAP as the account type.
You can now enter your email password. Then click Next.
Now enter imap.secureserver.net as the incoming server address. Then click Next.
Now enter smtpout.secureserver.net as the outgoing server address. Then click Next.
You can adjust the account options if needed, or simply click Next.
The account is now set up.
In the last step, under Your name, you can choose which name will be displayed in sent messages.
Finally, click Next.