In dieser Anleitung erklären wir Ihnen, wie Sie die zuvor im KIS eingerichteten E-Mail-Adressen auf Ihrem iOS-Gerät einbinden können.
Was wird eingerichtet?
IMAP mit TLS-Verschlüsselung ⇒ empfohlen!
Mit welcher iOS Version von funktioniert diese Anleitung?
Ab iOS 15
Kurzanleitung:
Für die Einrichtung eines Mailkontos benötigen Sie folgende Informationen:
→ Posteingangsserver: wpxxxxxxx.mail.server-he.de (Hinweis: Der Platzhalter "XXXXXXX" entspricht der ID Ihres Vertrages)
→ empfohlene Verschlüsselung: TLS
→ Postausgangsserver: wpxxxxxxx.mailout.server-he.de (Hinweis: Der Platzhalter "XXXXXXX" entspricht der ID Ihres Vertrages)
→ empfohlene Verschlüsselung: TLS
→ Benutzername: wpxxxxxxx-Kontoname* (Hinweis: Der Platzhalter "XXXXXXX" entspricht der ID Ihres Vertrages)
→ Passwort: (ihr selbst definiertes Passwort)
*Den Kontonamen haben Sie im KIS beim Anlegen des E-Mailkontos selbst vergeben.
Ausführliche Anleitung:
Einrichtung einer zusätzlichen E-Mail-Adresse
Sofern Sie bereits eine E-Mail-Adresse in Ihrem iPhone/iPad eingerichtet haben, folgen Sie bitte zunächst diesen Schritten. Wenn Sie noch keine E-Mail-Adresse eingerichtet haben, können Sie diese Schritte hier überspringen und direkt im Abschnitt Ersteinrichtung weiter unten fortfahren. Diese Anleitung kann von älteren iOS-Versionen leicht abweichen:
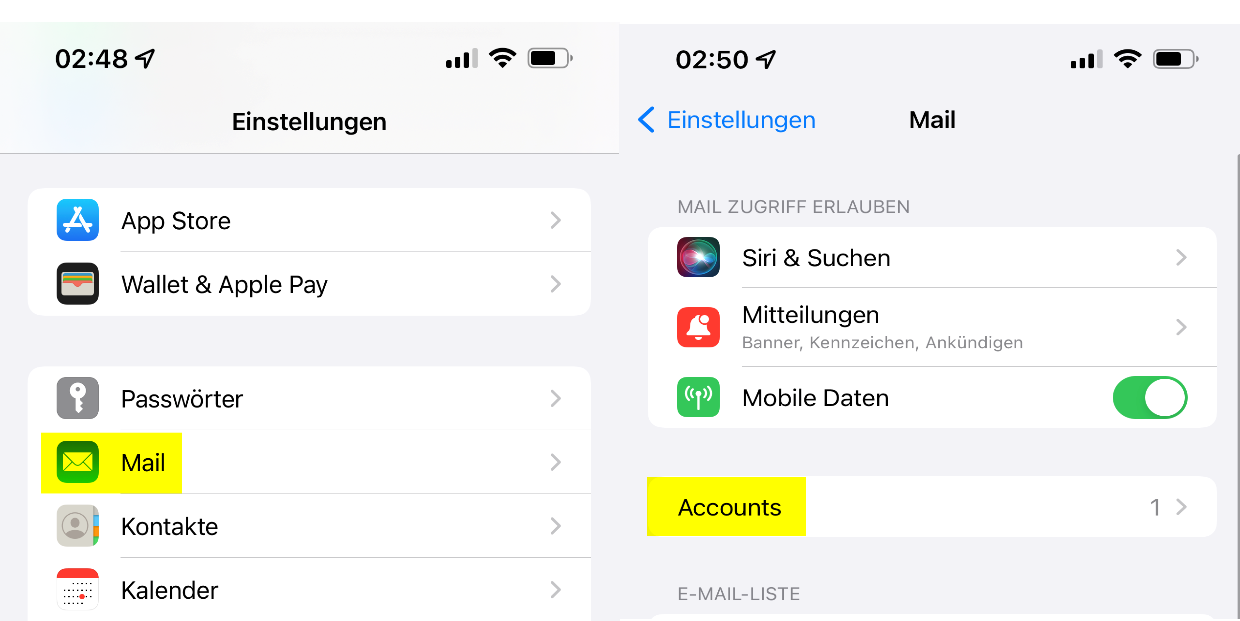
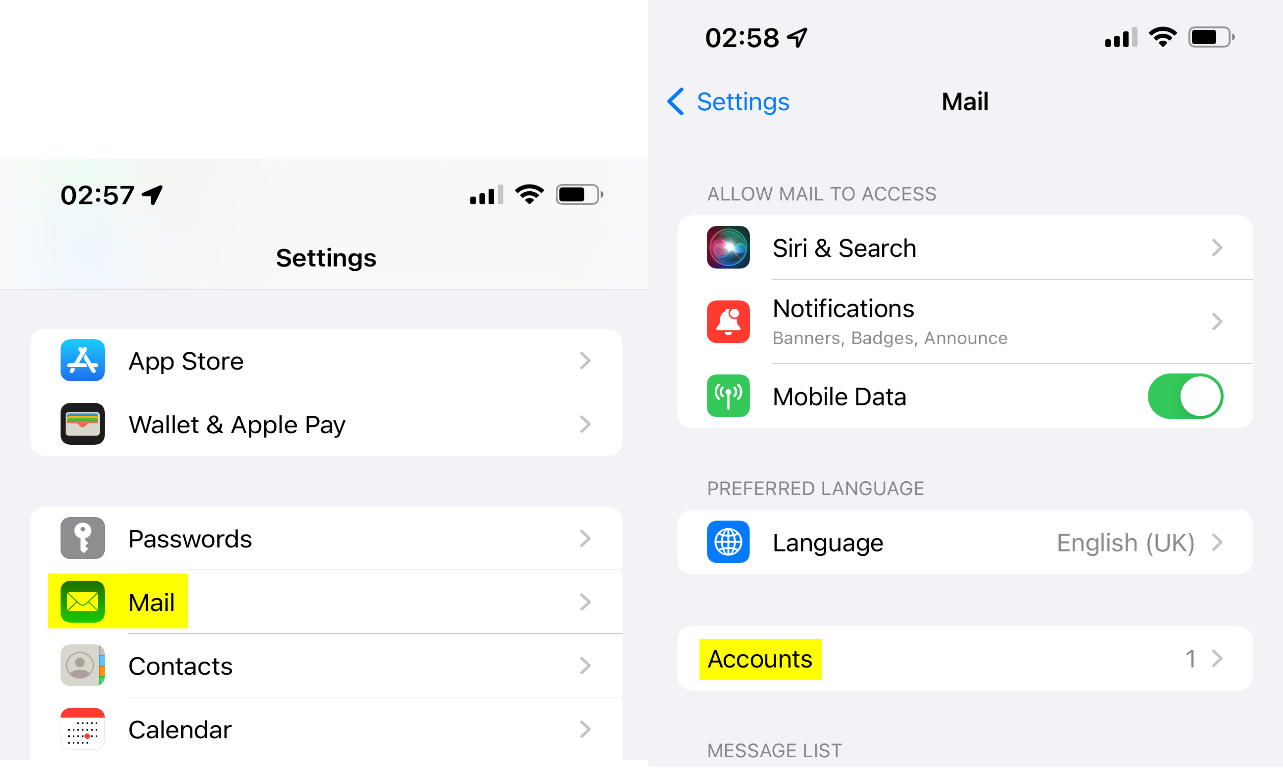
Öffnen Sie bitte die "Einstellungen" Ihres iPhones/iPads. Dort tippen Sie auf "Mail" und dann auf "Accounts":
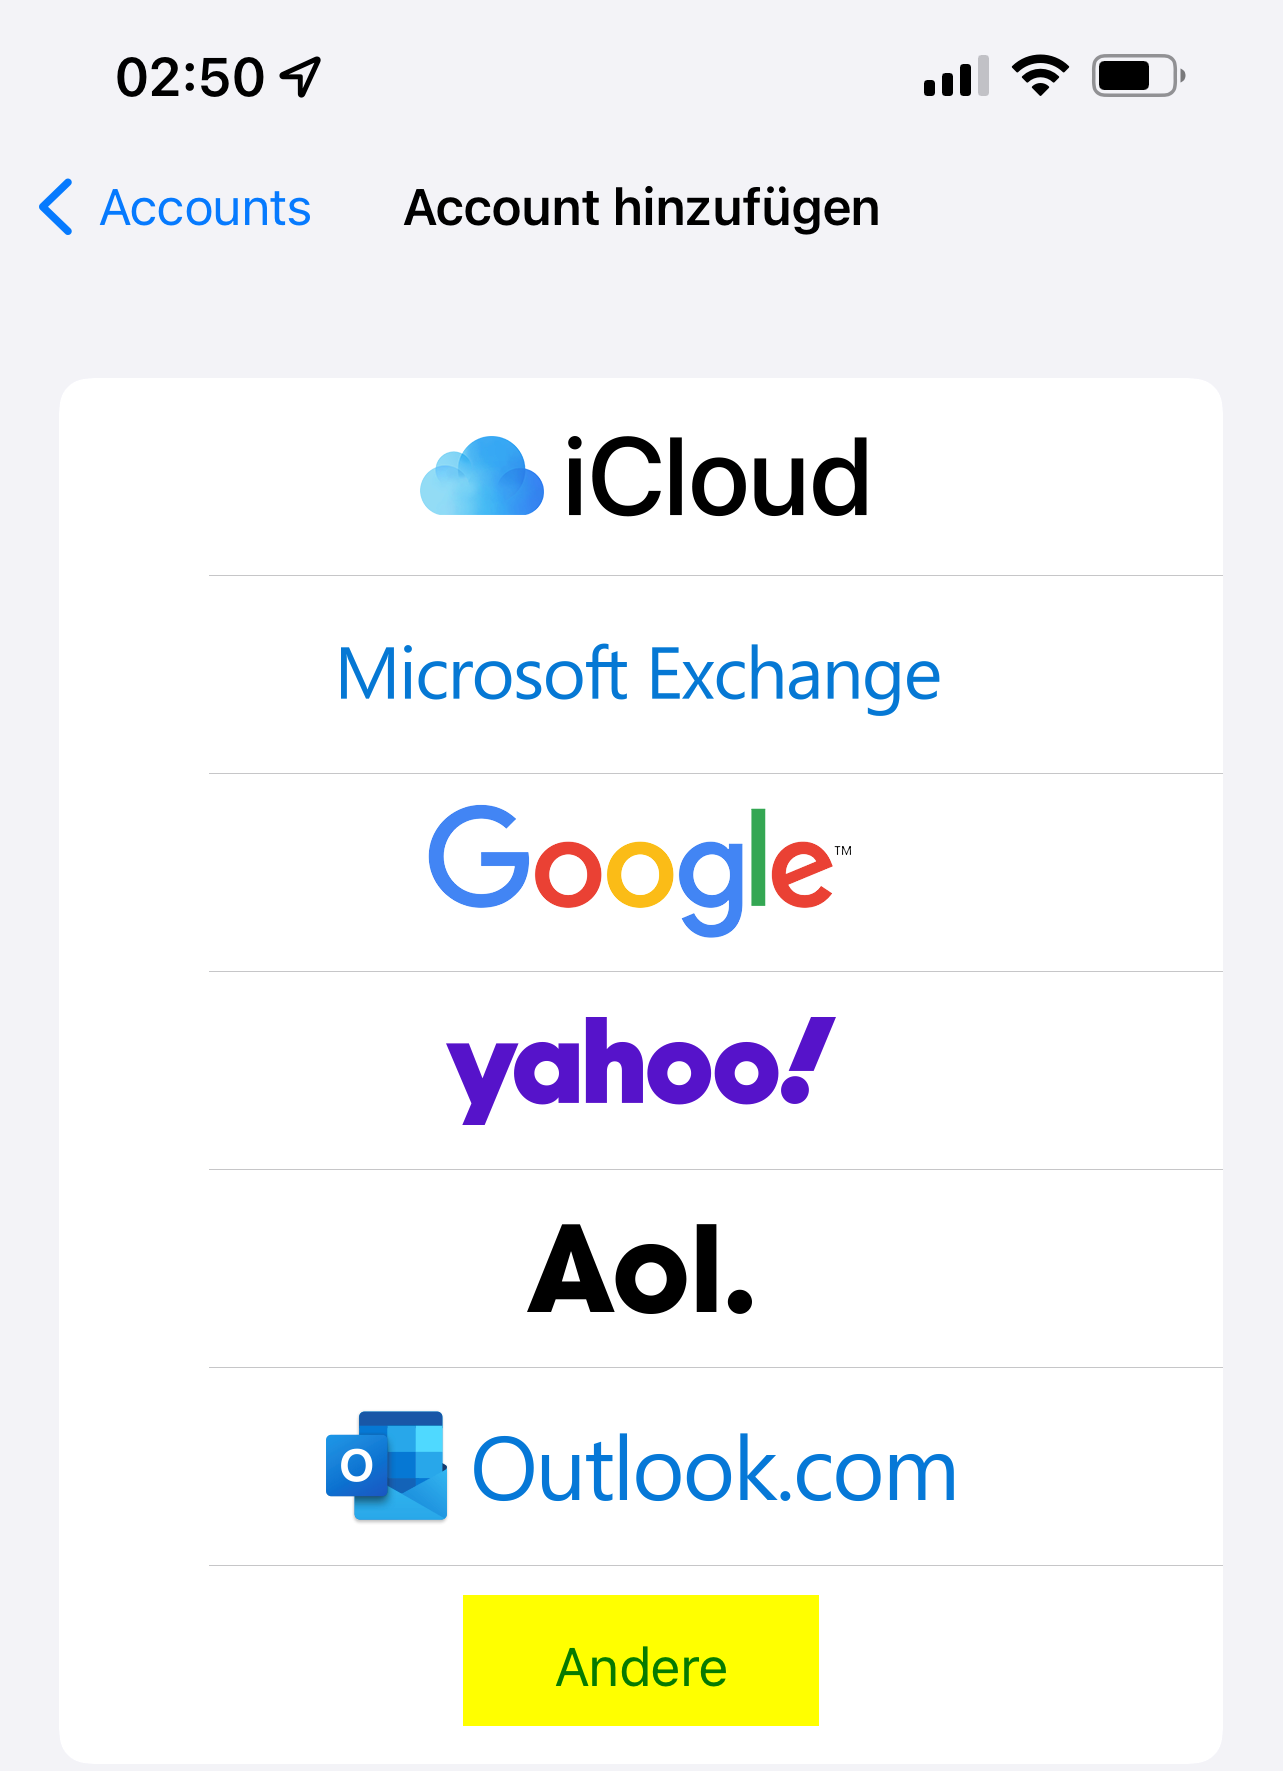
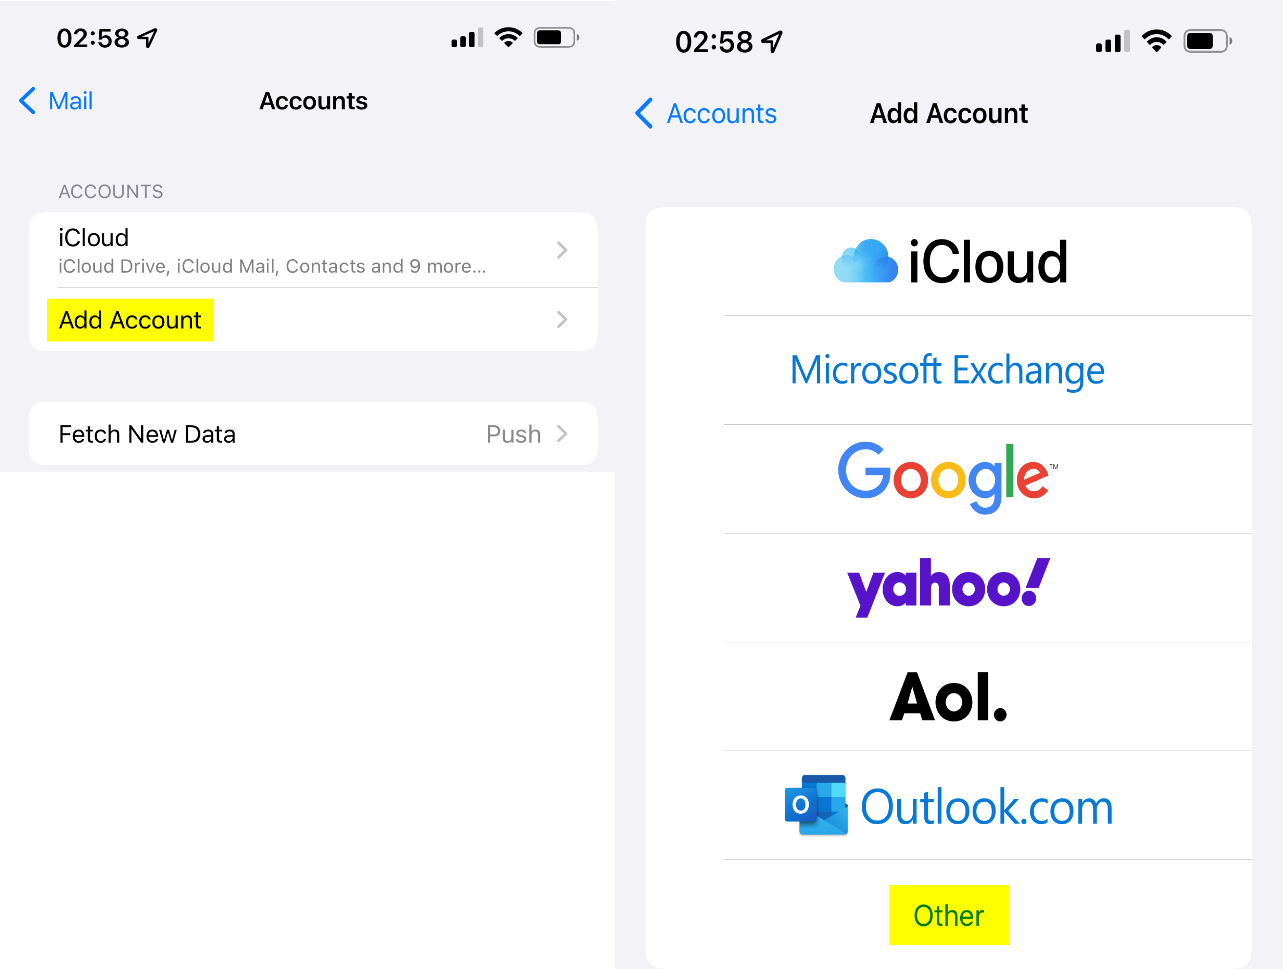
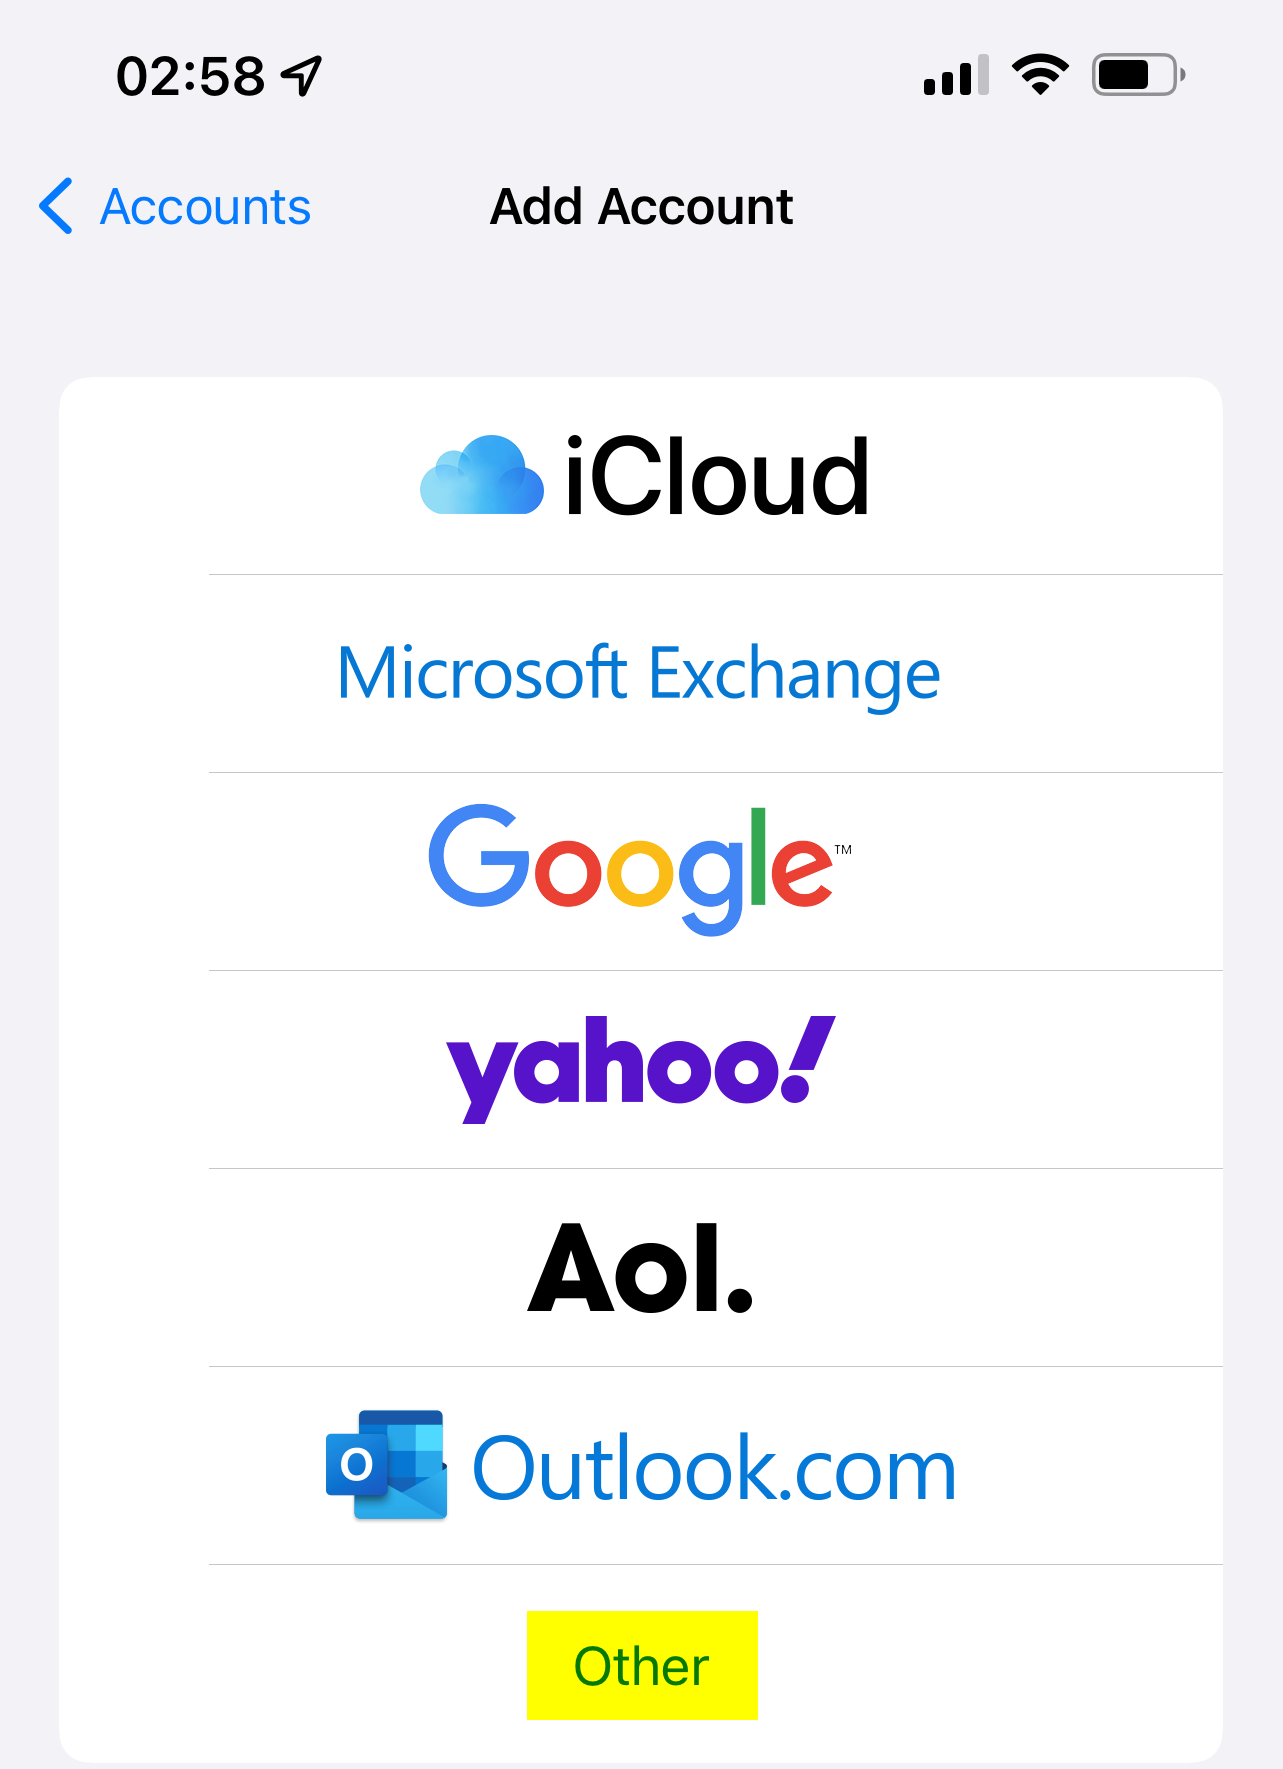
Als Nächstes tippen Sie bitte auf "Account hinzufügen" und danach auf "Andere":

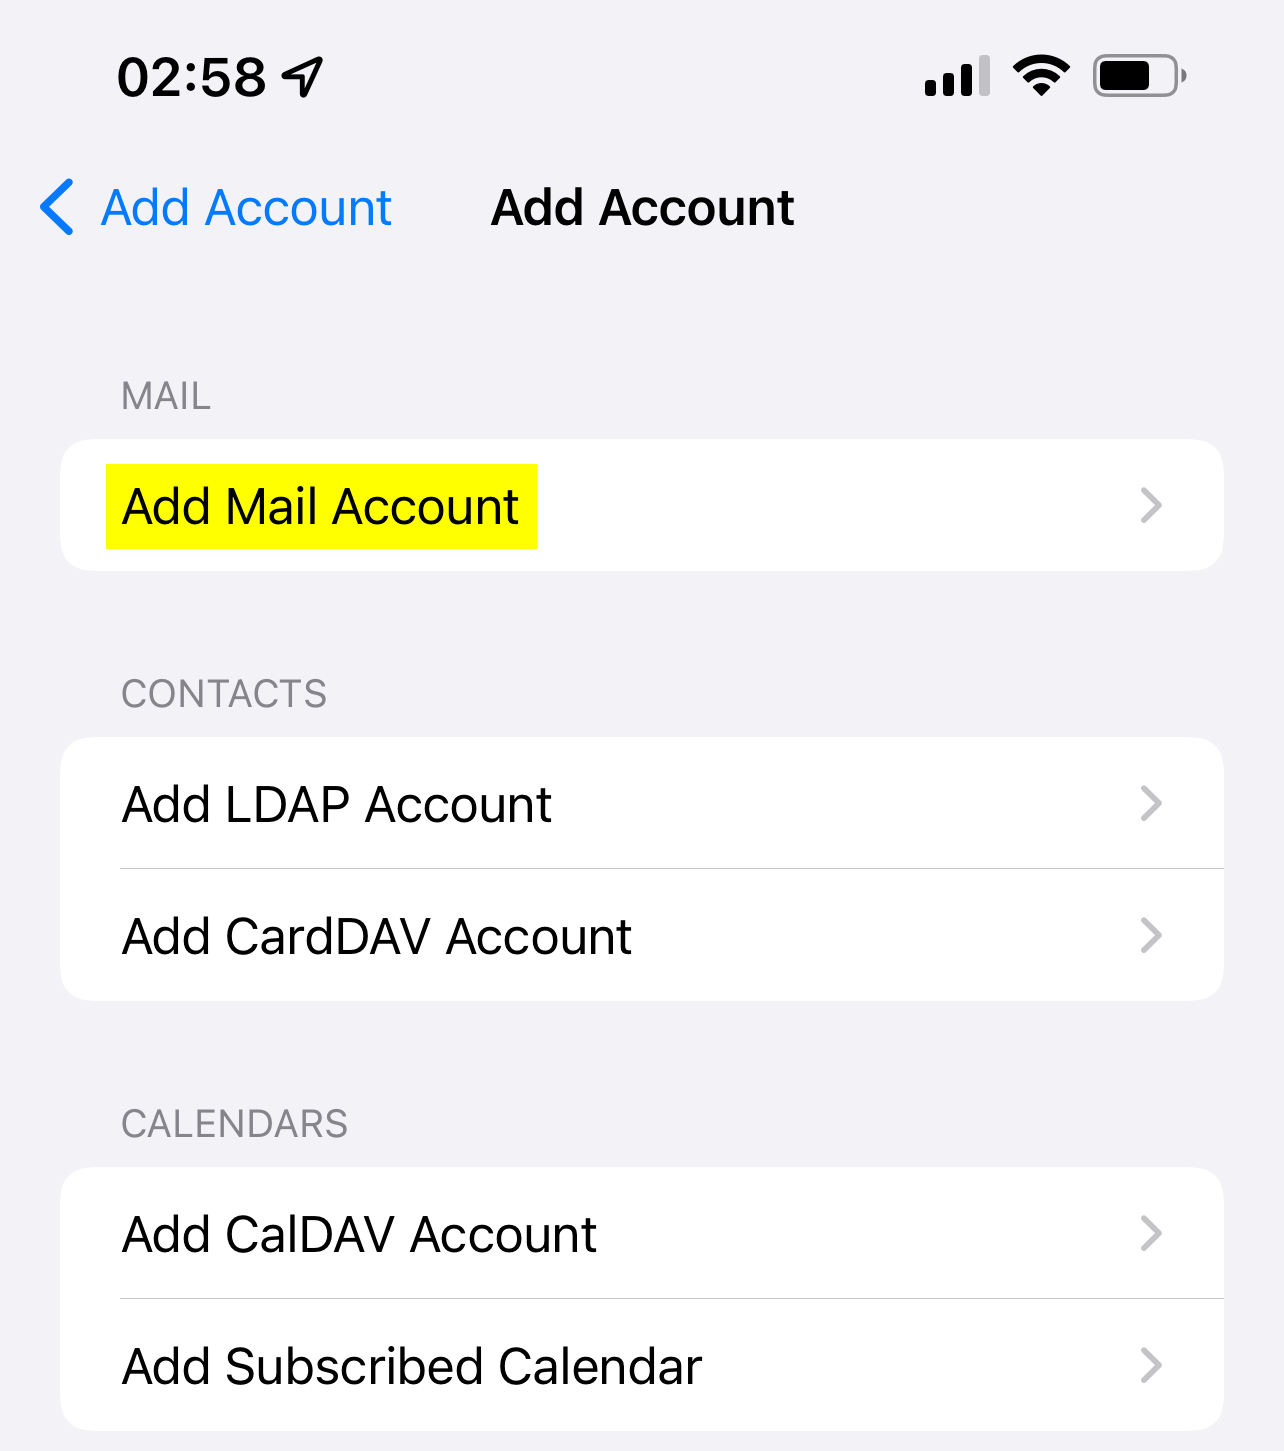
Nun tippen Sie bitte auf "Mail-Account hinzufügen":

Ersteinrichtung
Wenn Sie die Mail App zum ersten Mal starten und noch keine E-Mail-Adresse eingerichtet wurde, erscheint der folgende Dialog. Wählen Sie dort bitte "Andere" aus:
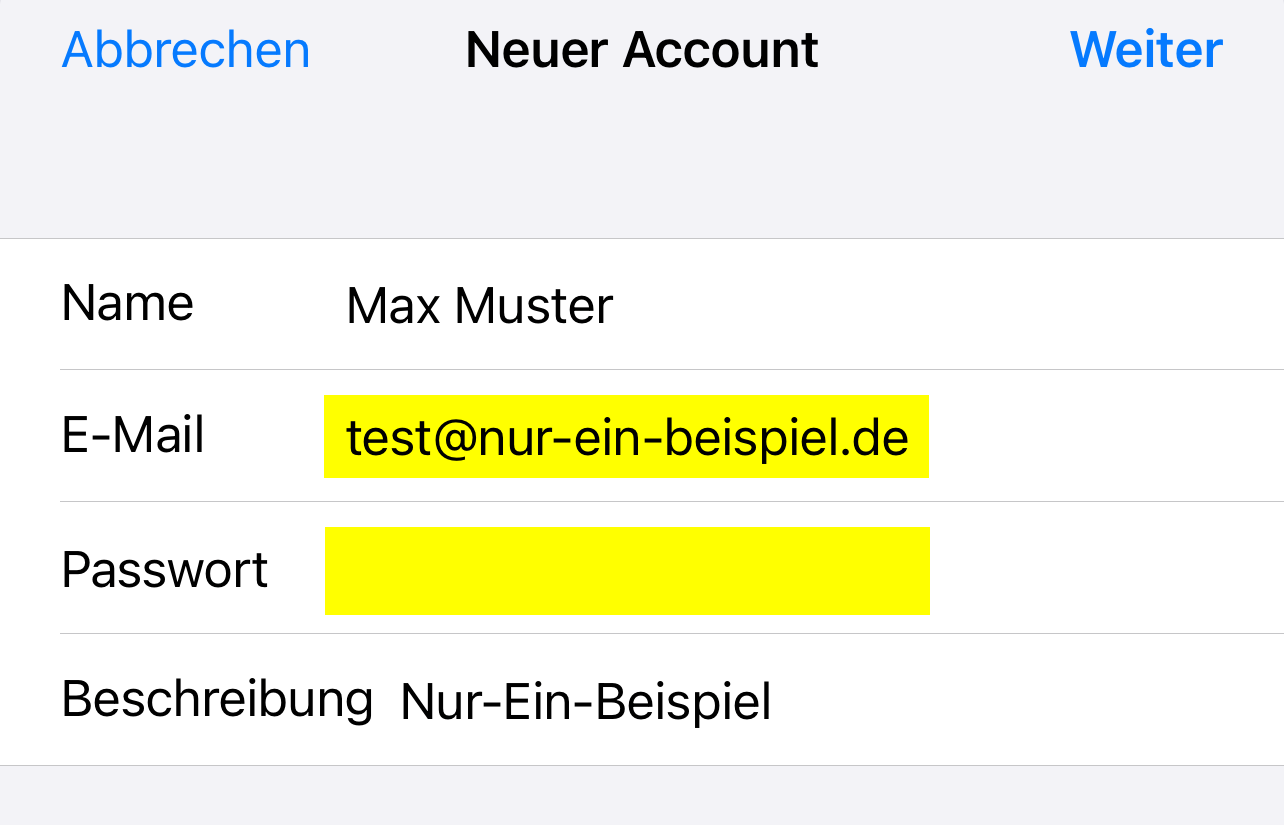
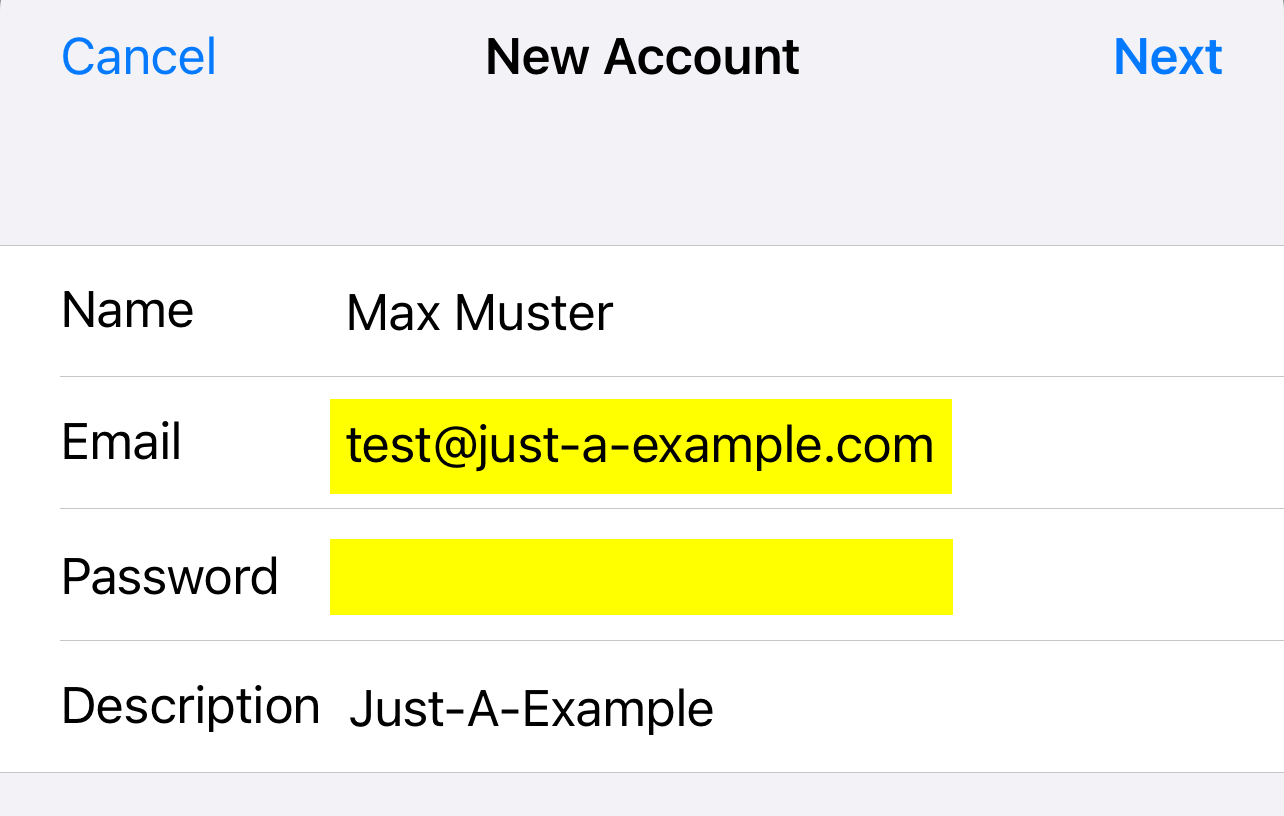
Geben Sie nun Ihre Daten ein und tippen dann auf "Weiter":
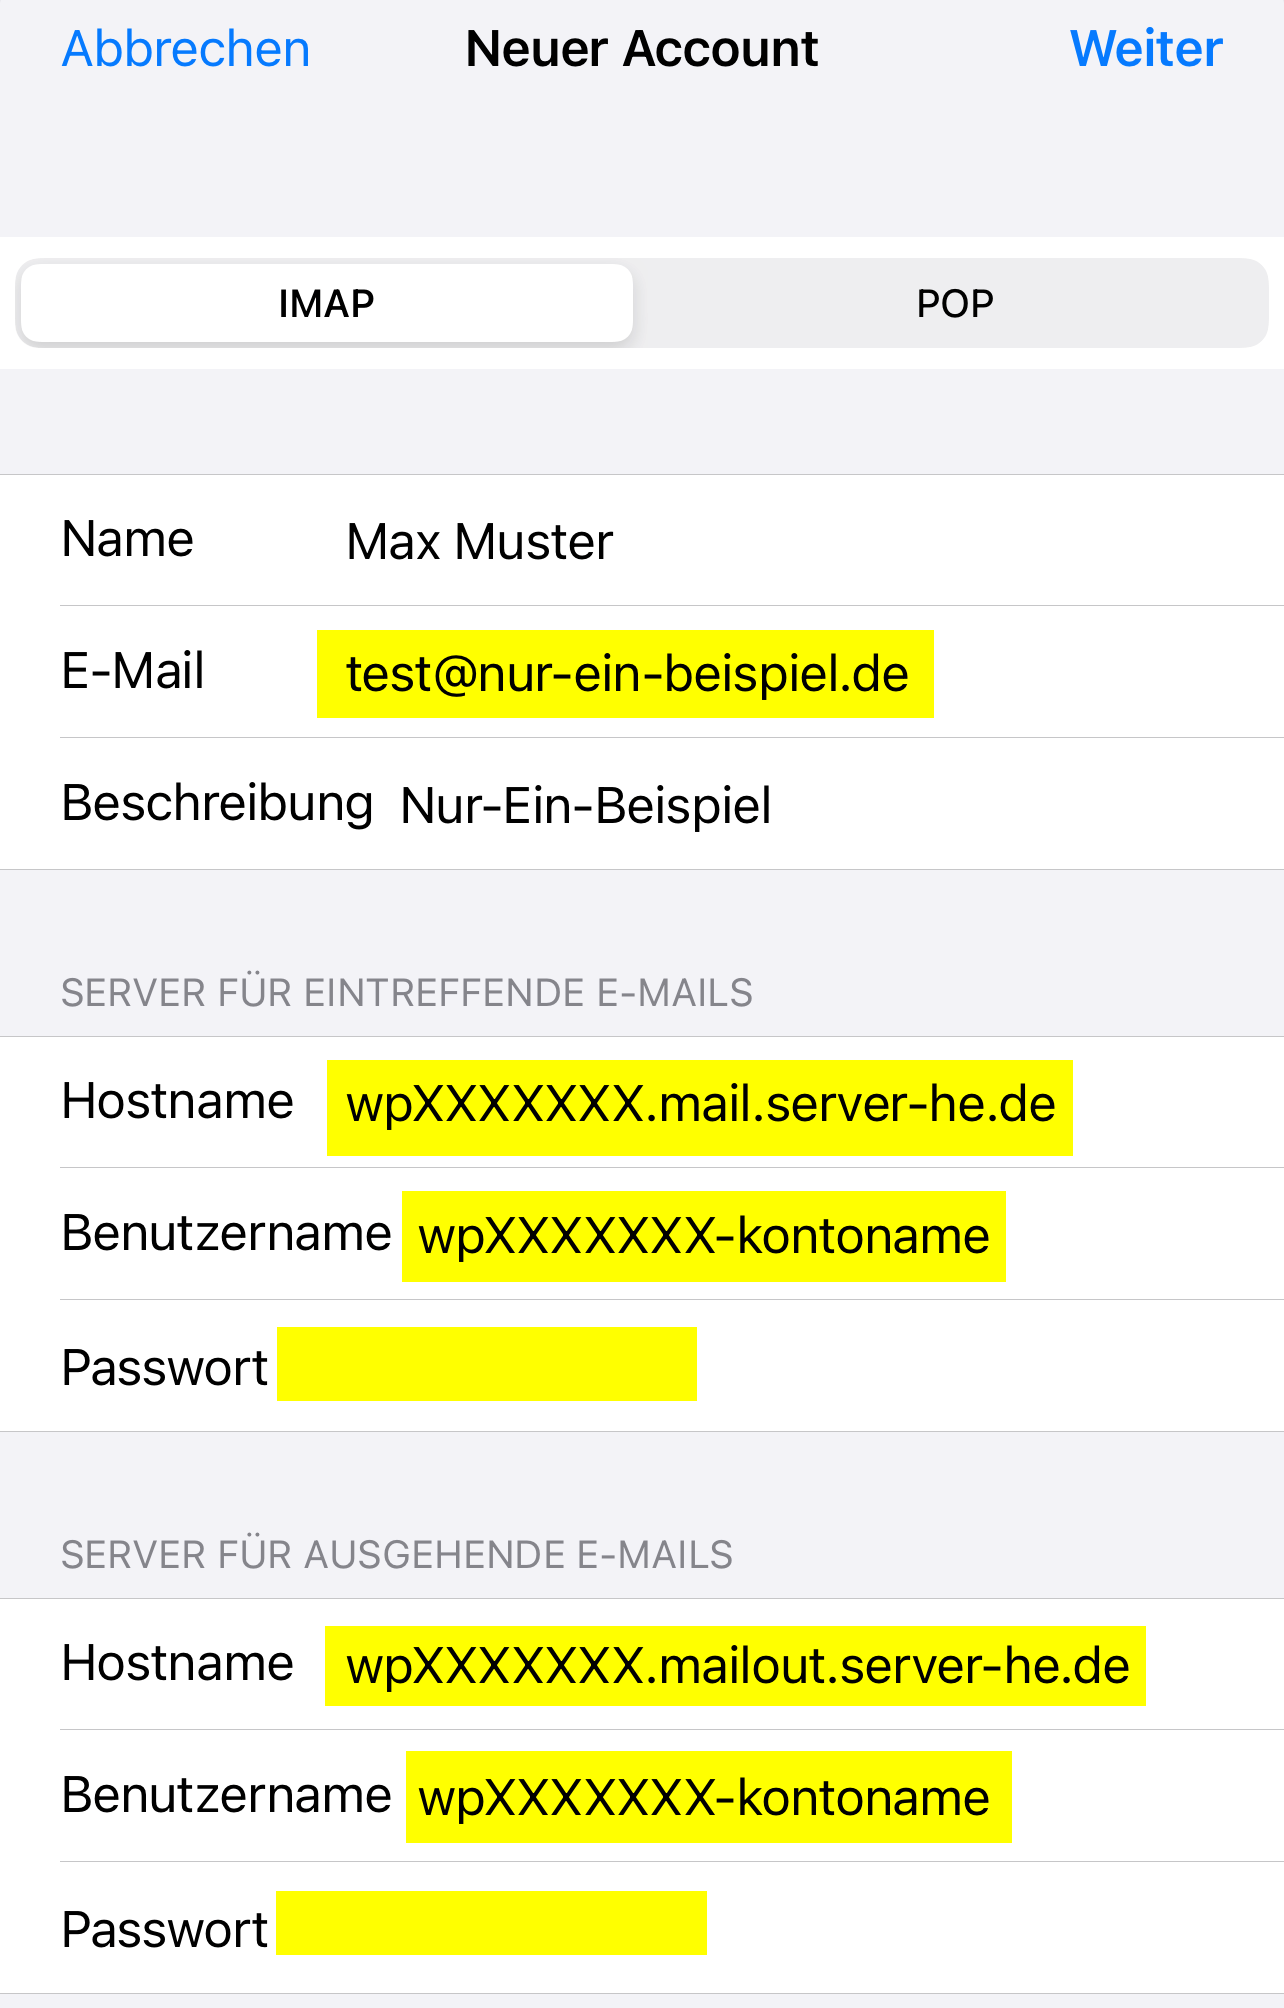
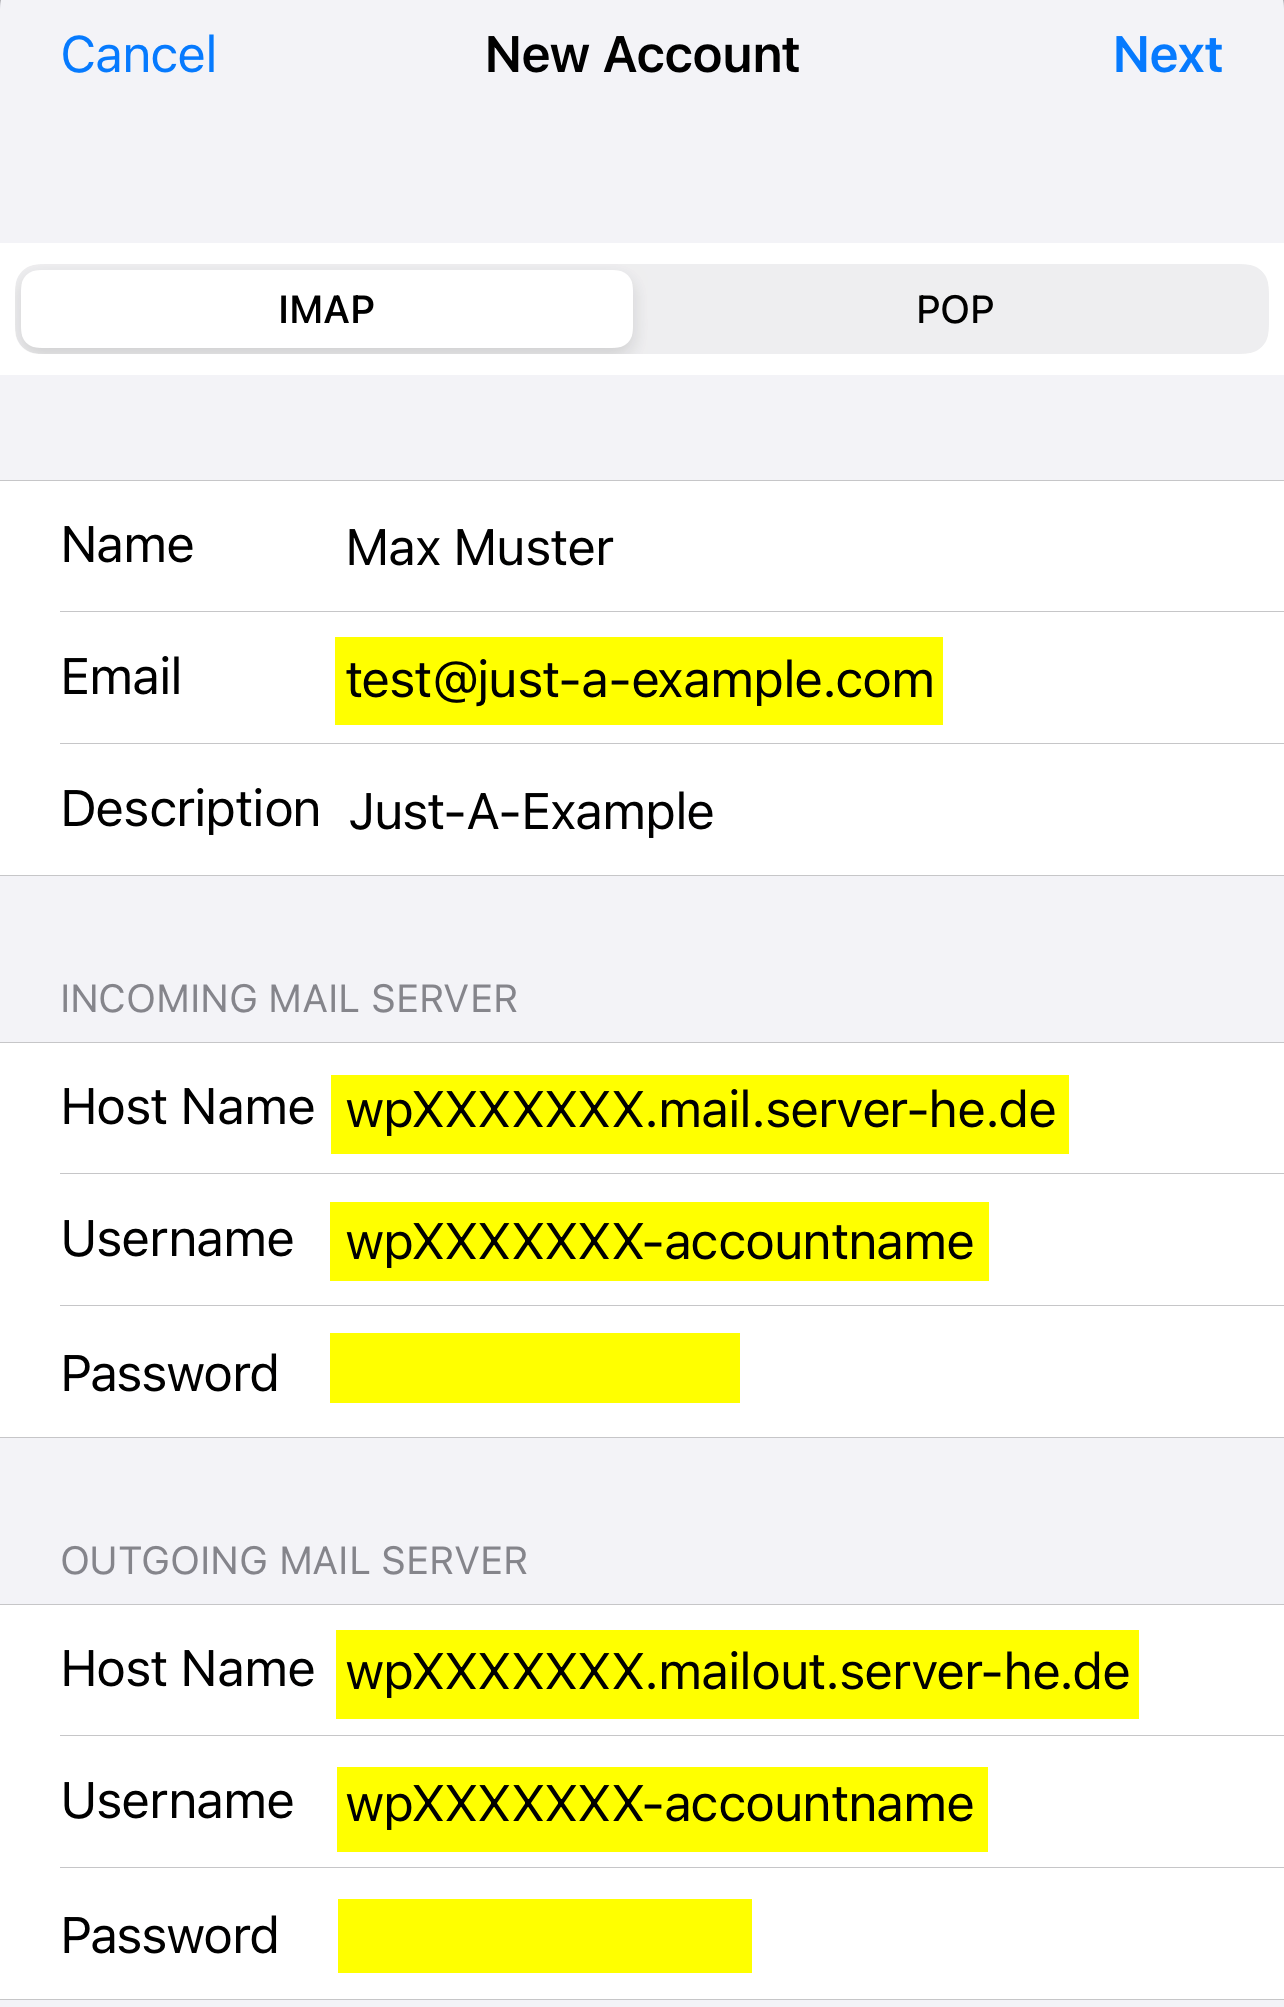
Tragen Sie nun Ihre Zugangsdaten in den gelb markierten Feldern ein.
ACHTUNG Füllen Sie die Felder "Benutzername" und "Passwort" im Abschnitt "Server für ausgehende E-Mails" bitte aus, auch wenn dort "Optional" steht. Tippen Sie dann oben rechts auf "Weiter":
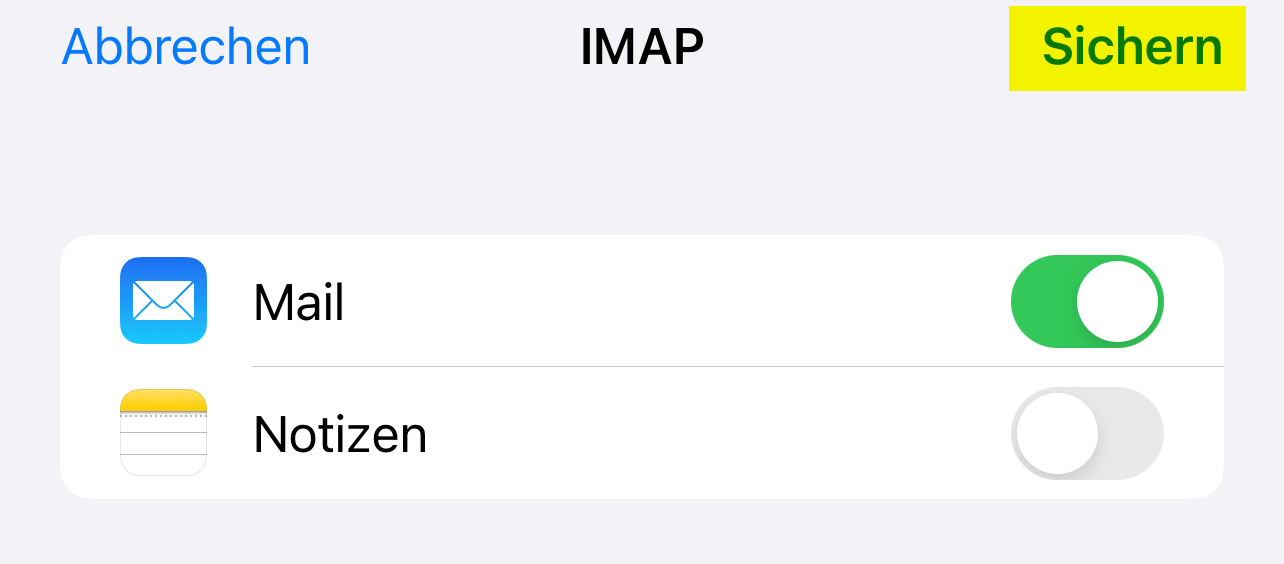
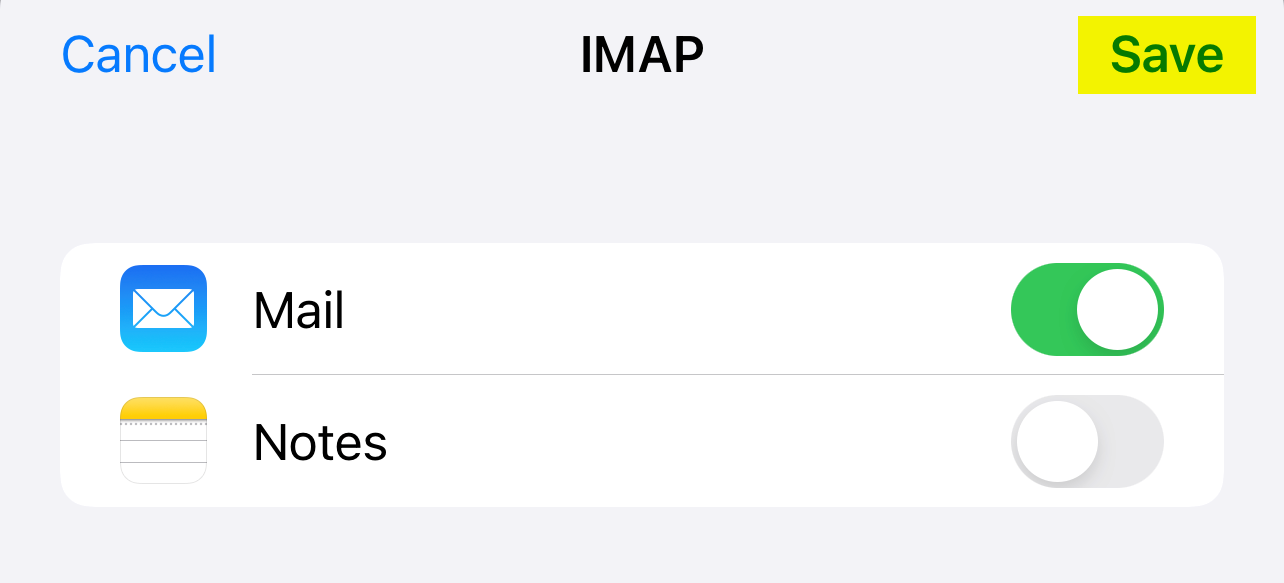
Sofern Sie alle Zugangsdaten richtig eingetragen haben, können Sie jetzt auf "Sichern" tippen:
Damit ist die Einrichtung der E-Mail-Adresse im iPhone/iPad abgeschlossen.
Mail-Einstellungen überprüfen
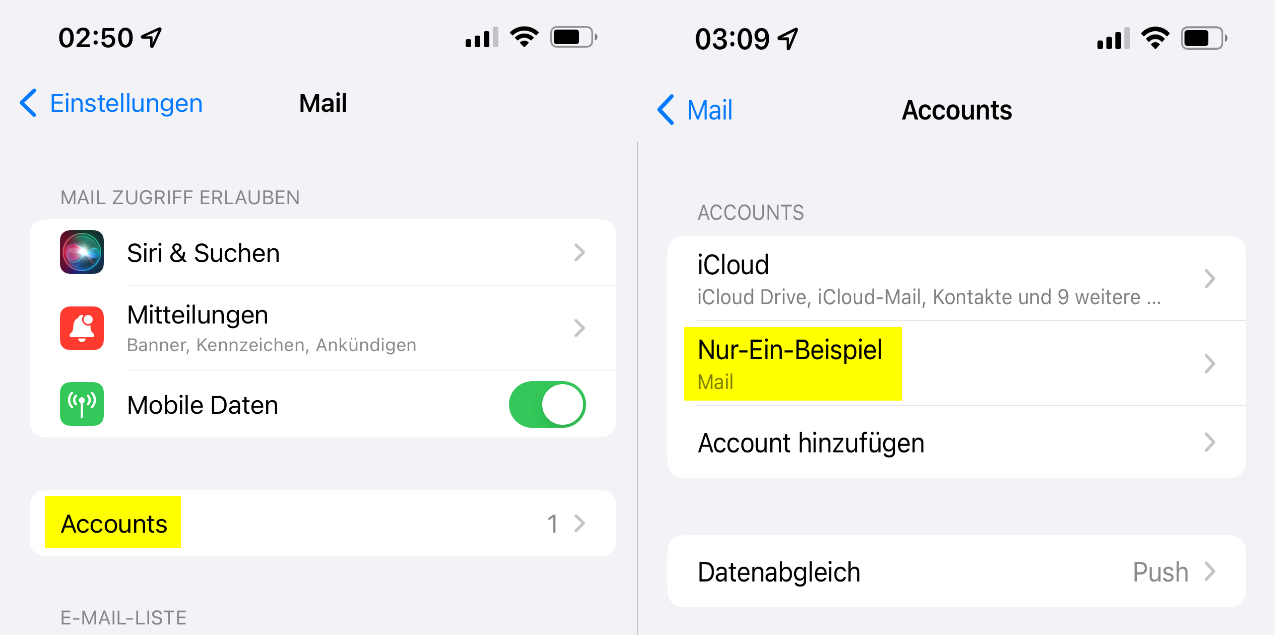
Öffnen Sie bitte die "Einstellungen" Ihres iPhones/iPads. Dort tippen Sie auf "Mail" dann "Accounts" und dann auf den betreffenden Account:
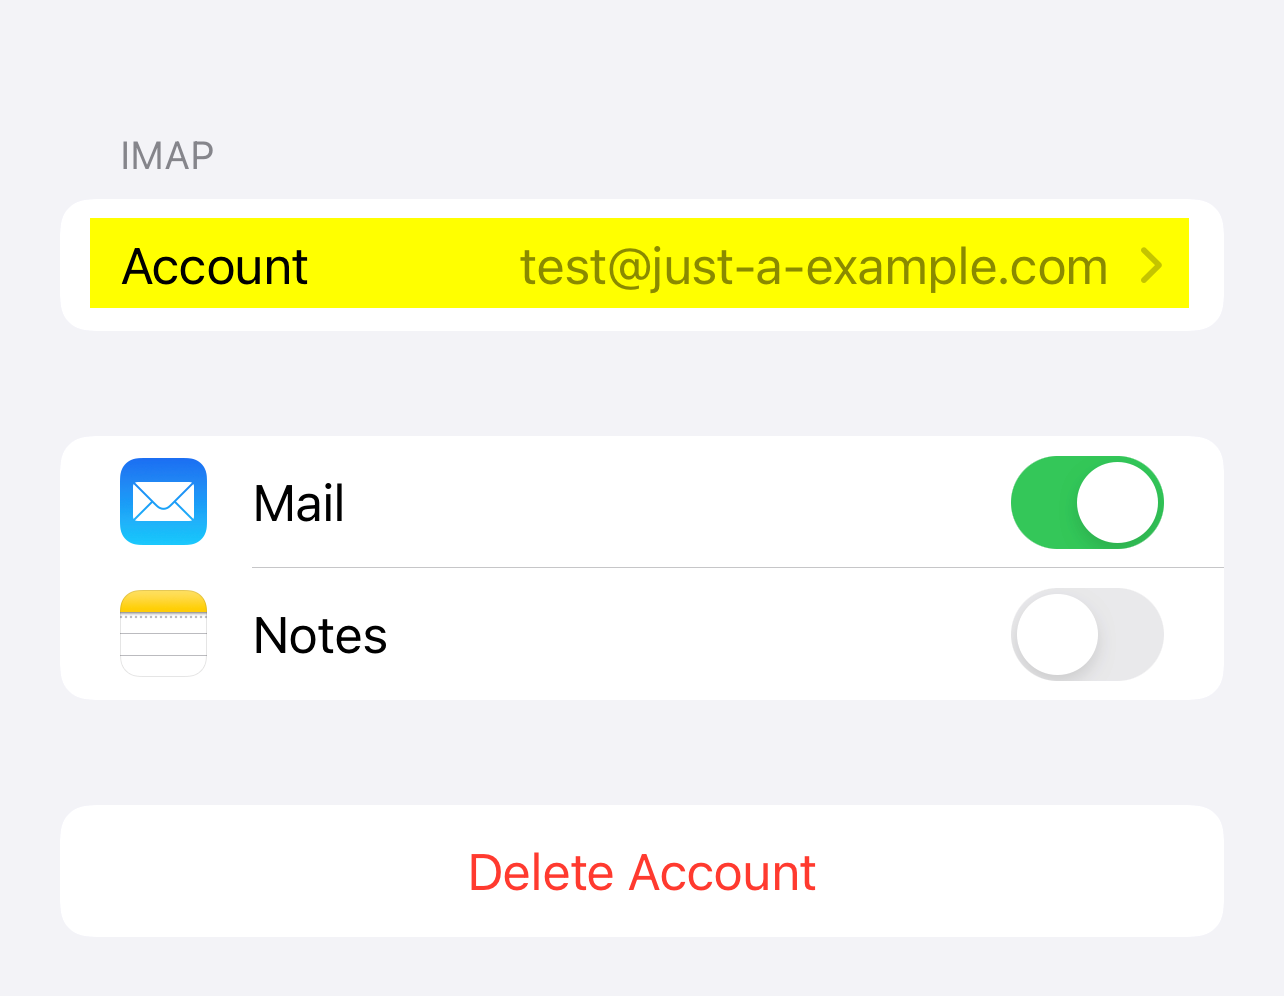
Tippen Sie nun auf "Account":
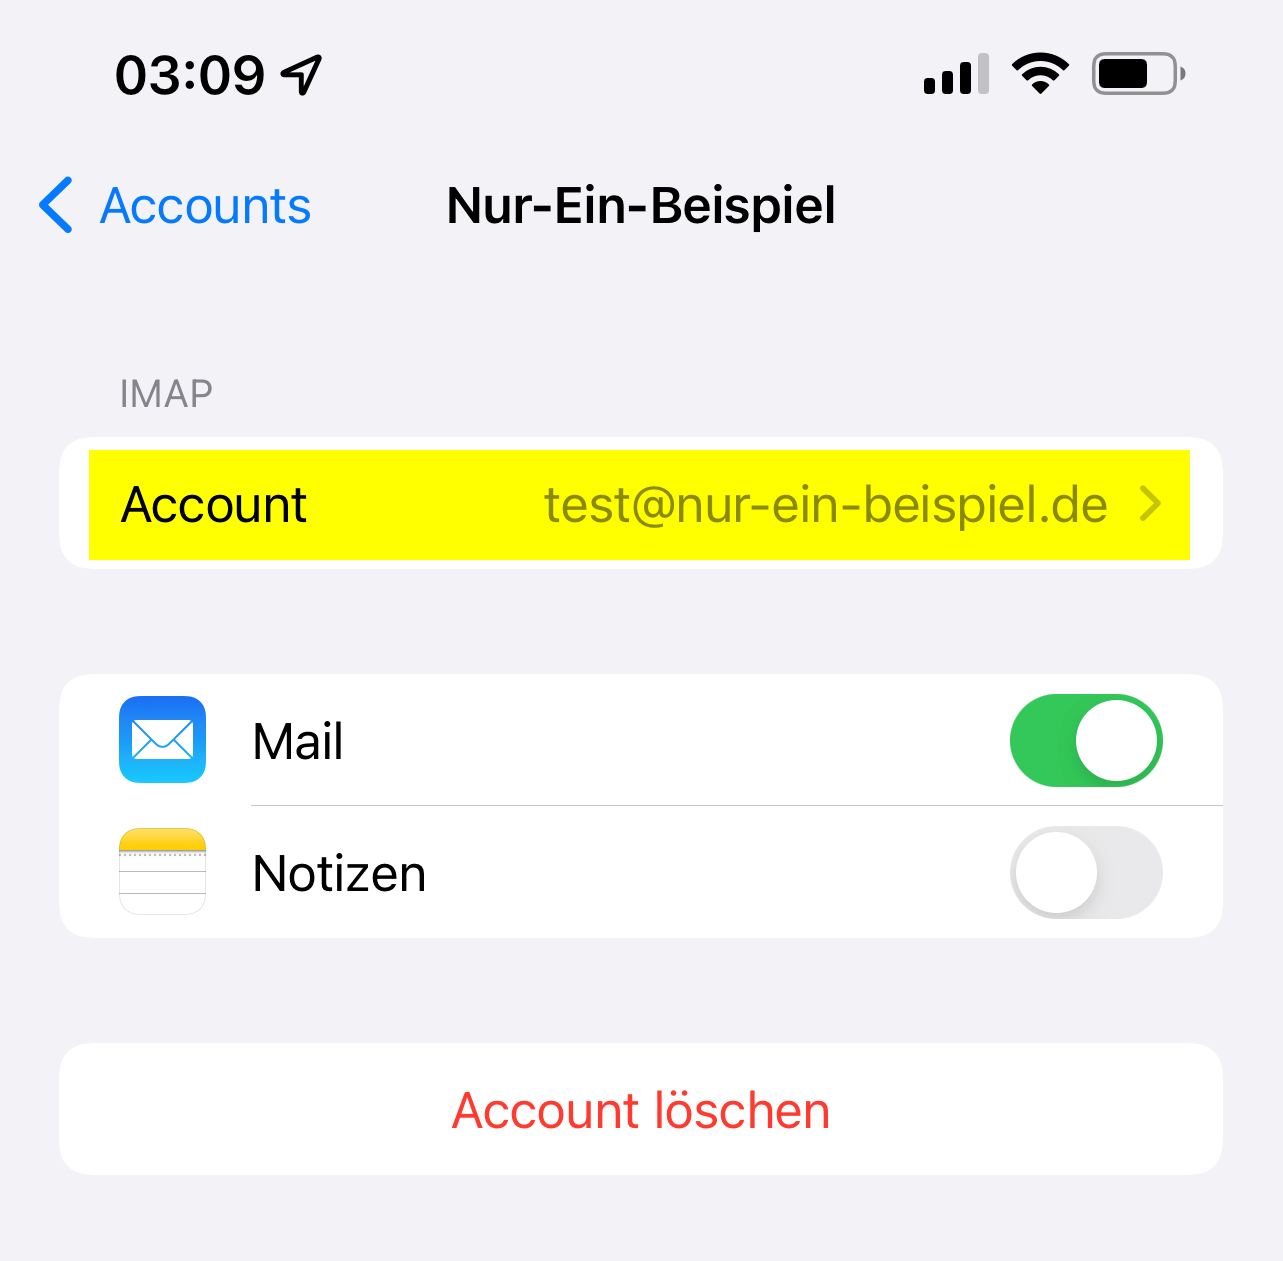
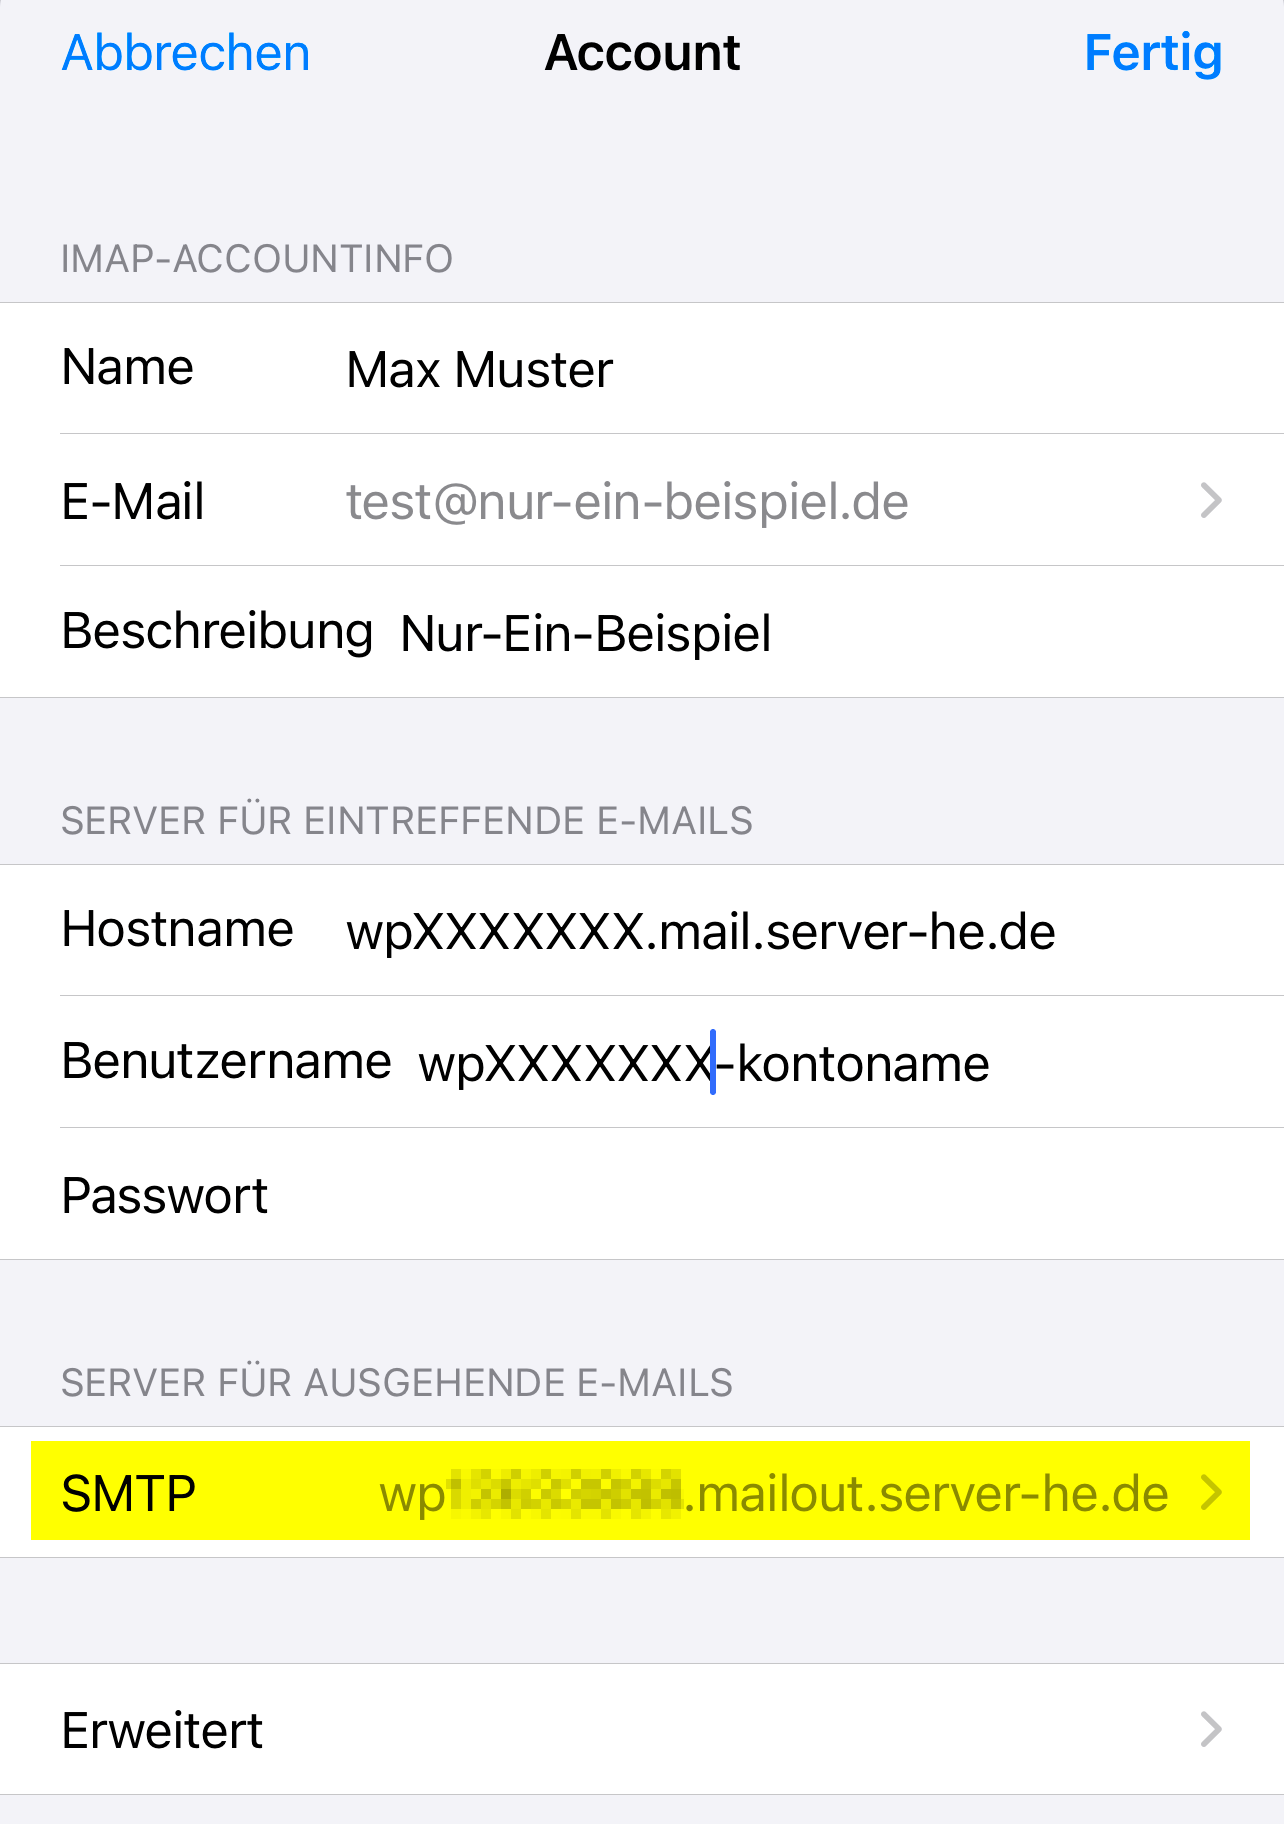
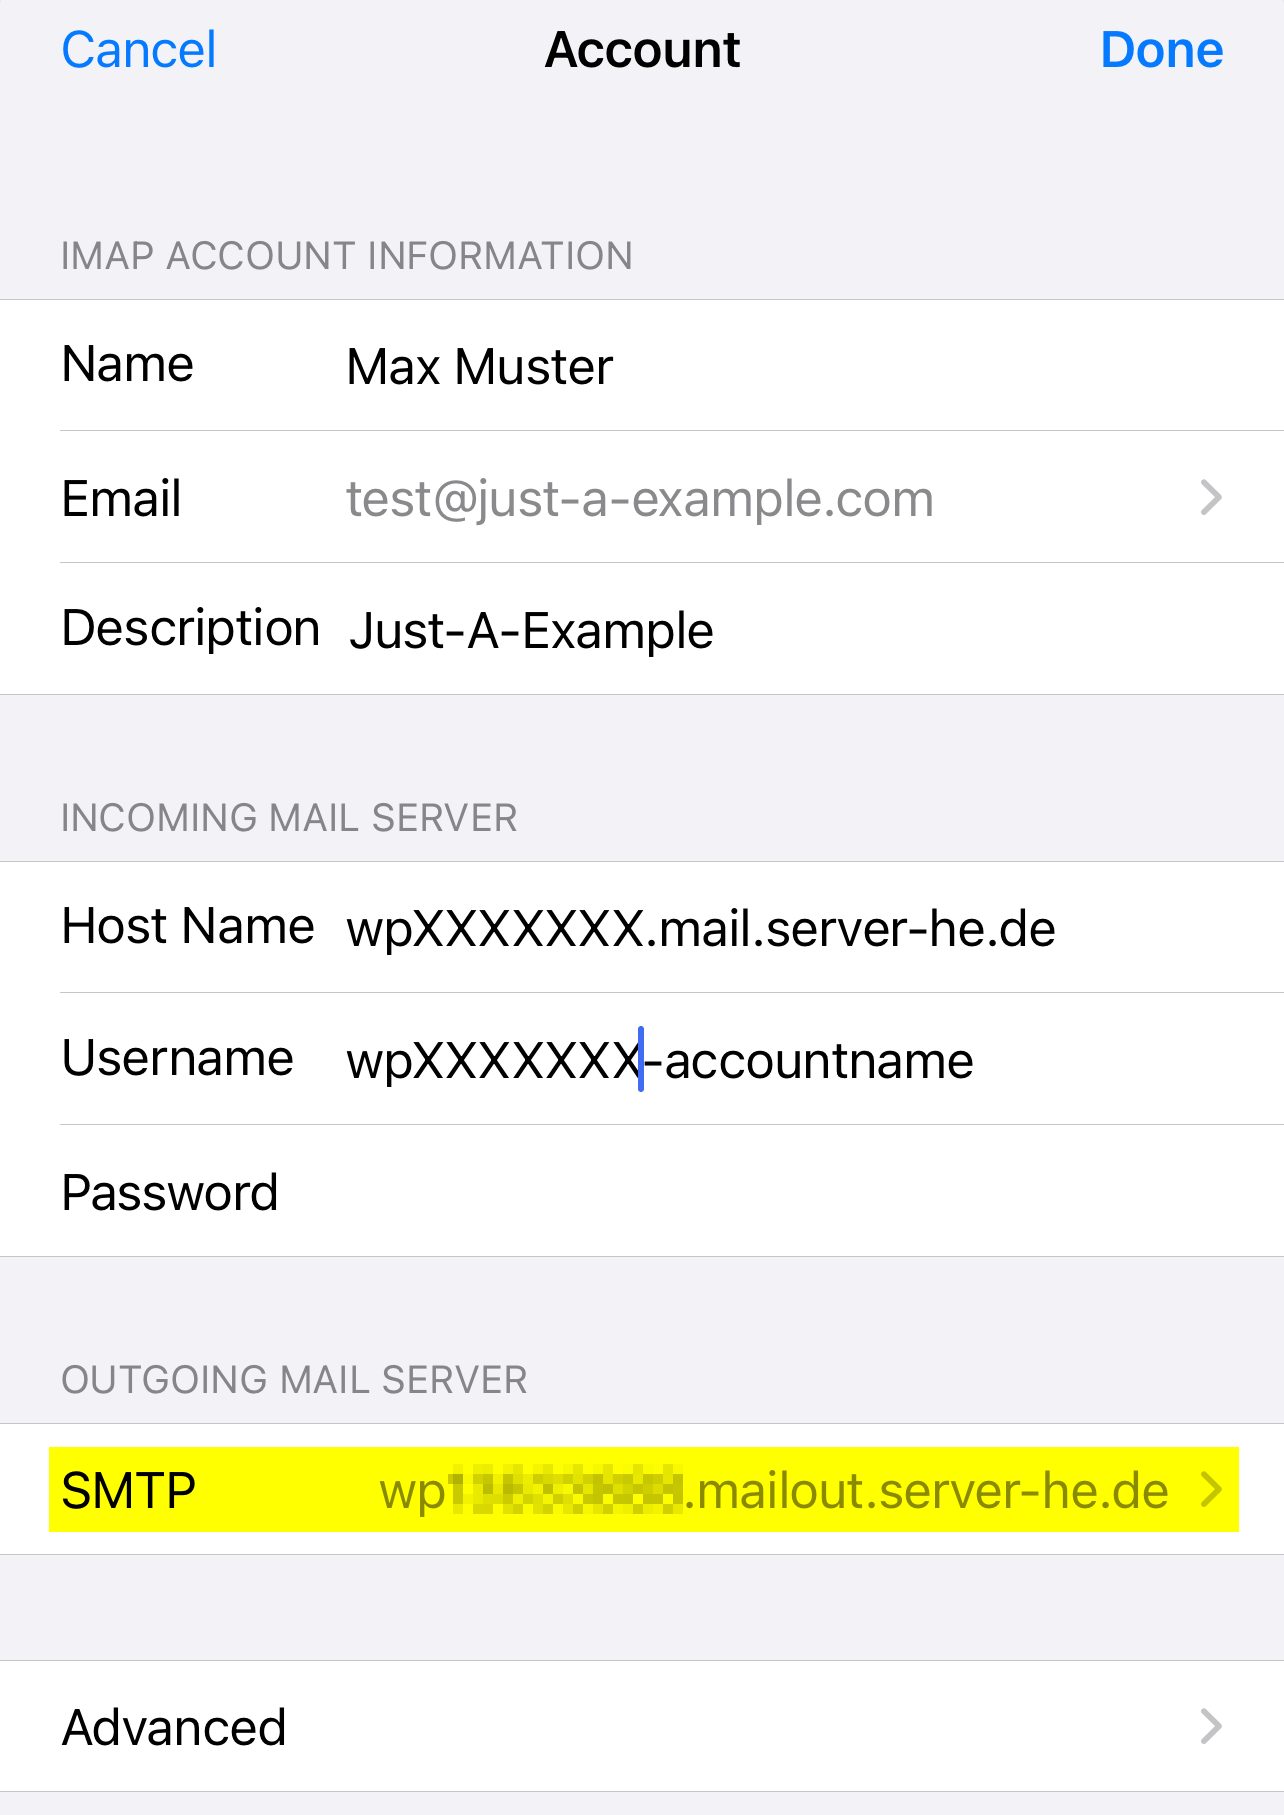
Jetzt können Sie die Einstellungen für eintreffende Mails überprüfen und ggfls. korrigieren. Falls Sie Probleme mit dem Senden von E-Mails haben, tippen Sie in dieser Ansicht bitte auf "SMTP":
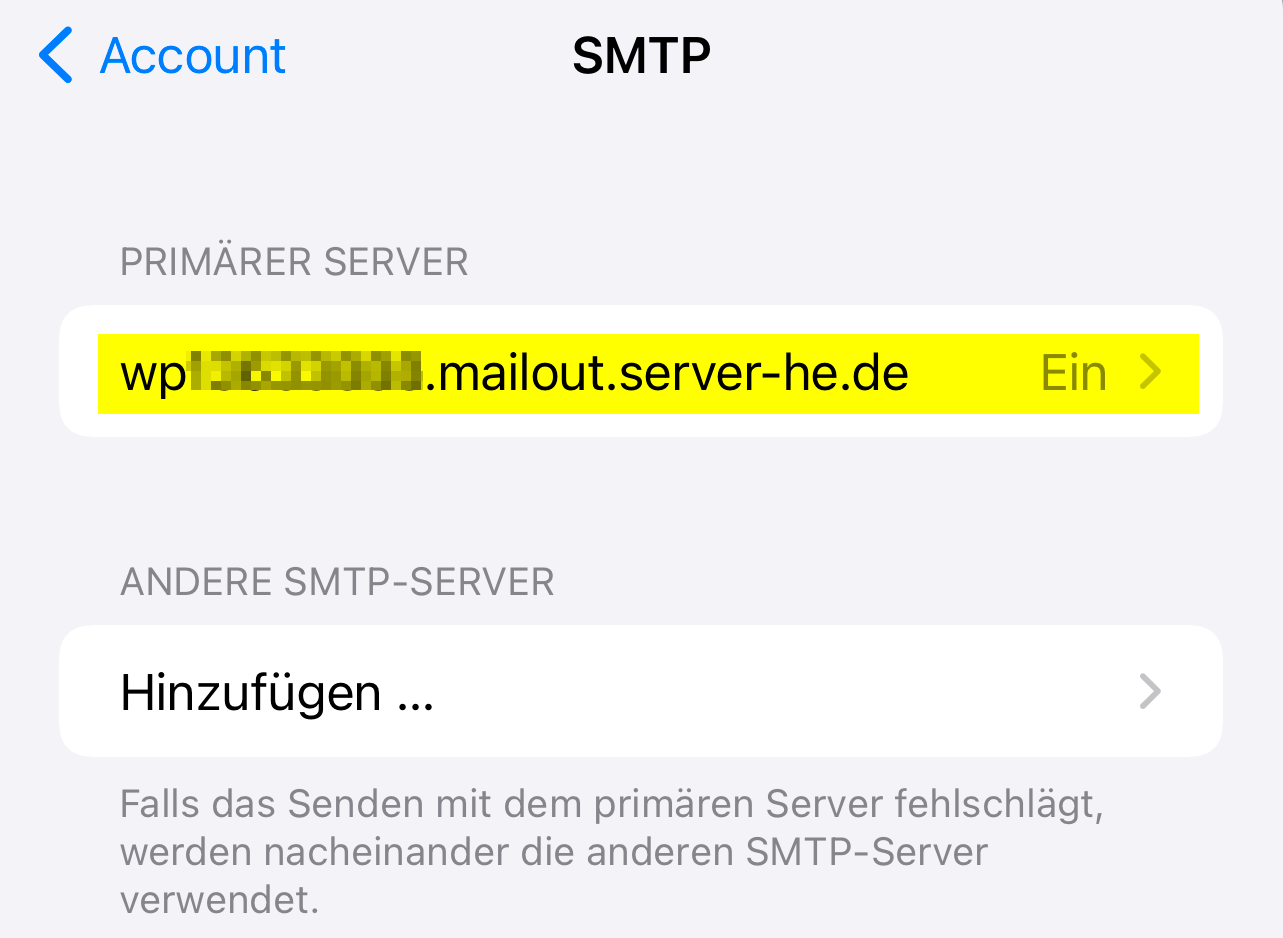
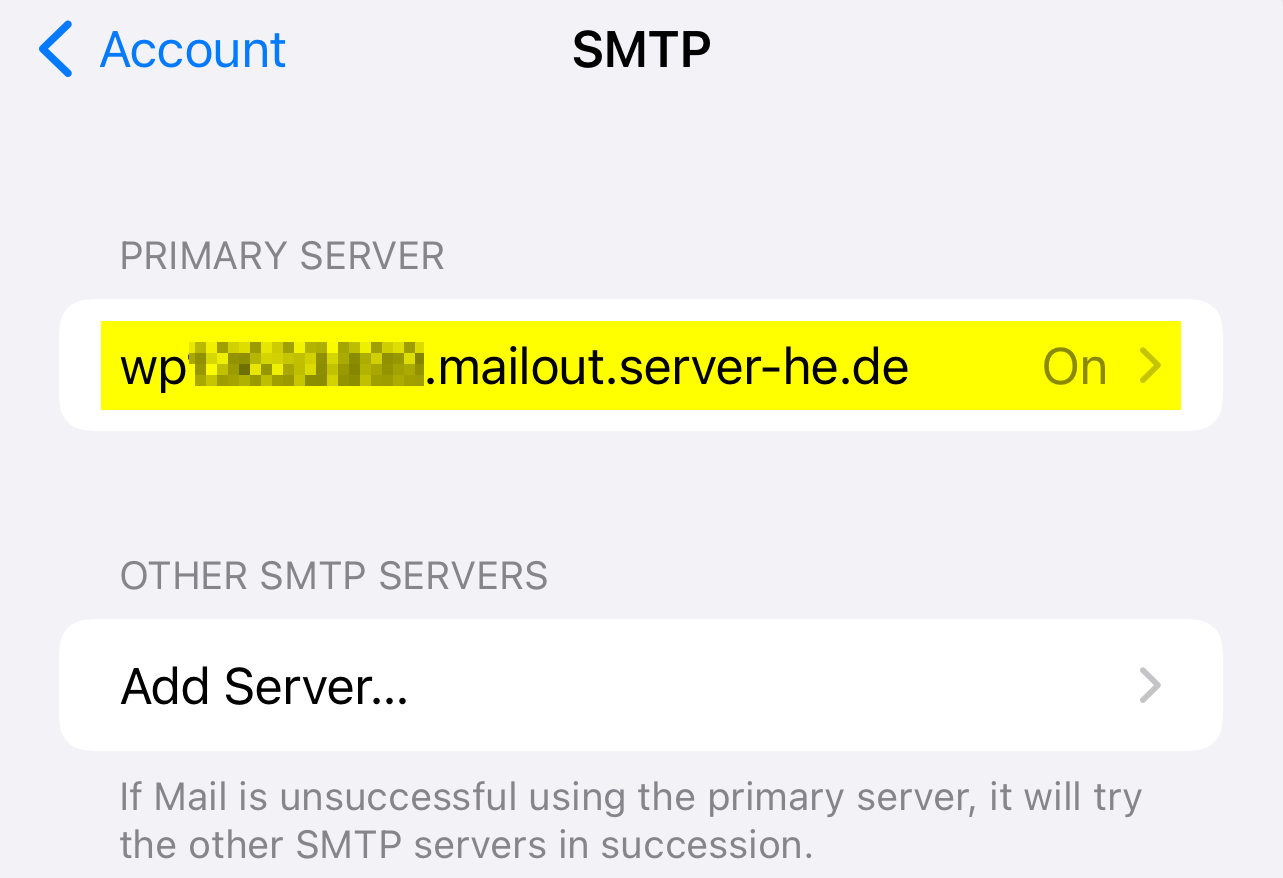
Hier tippen Sie bitte auf den Eintrag unter "Primärer Server":
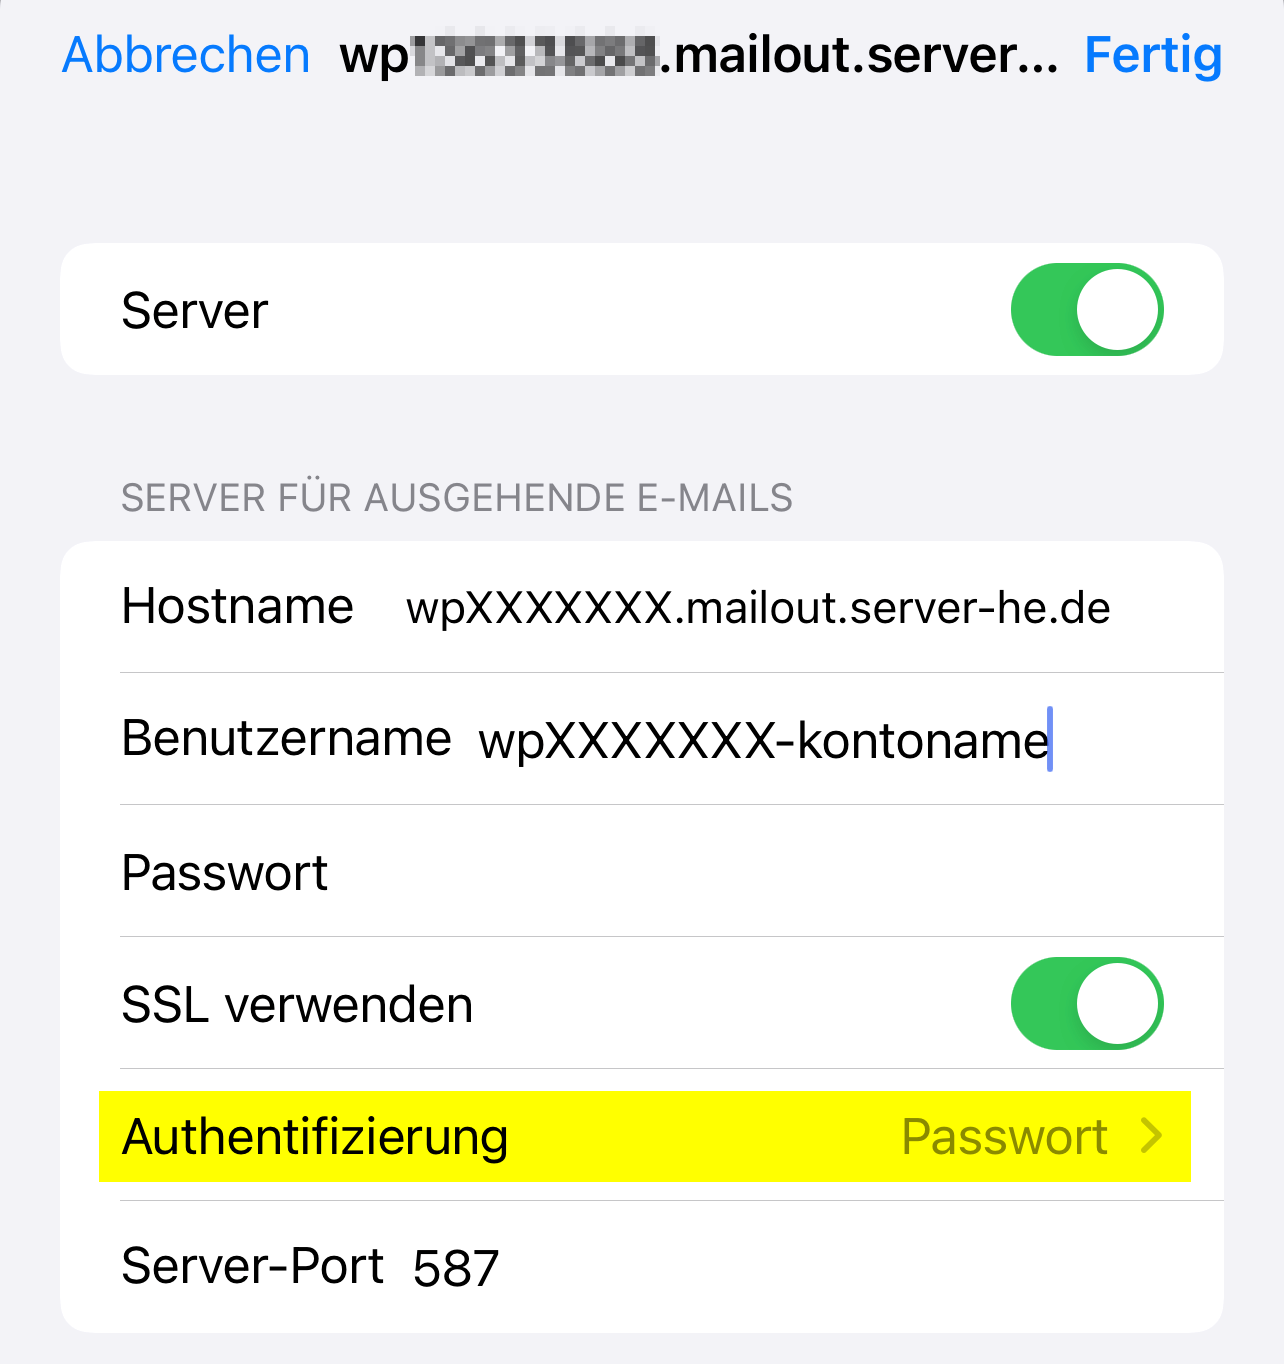
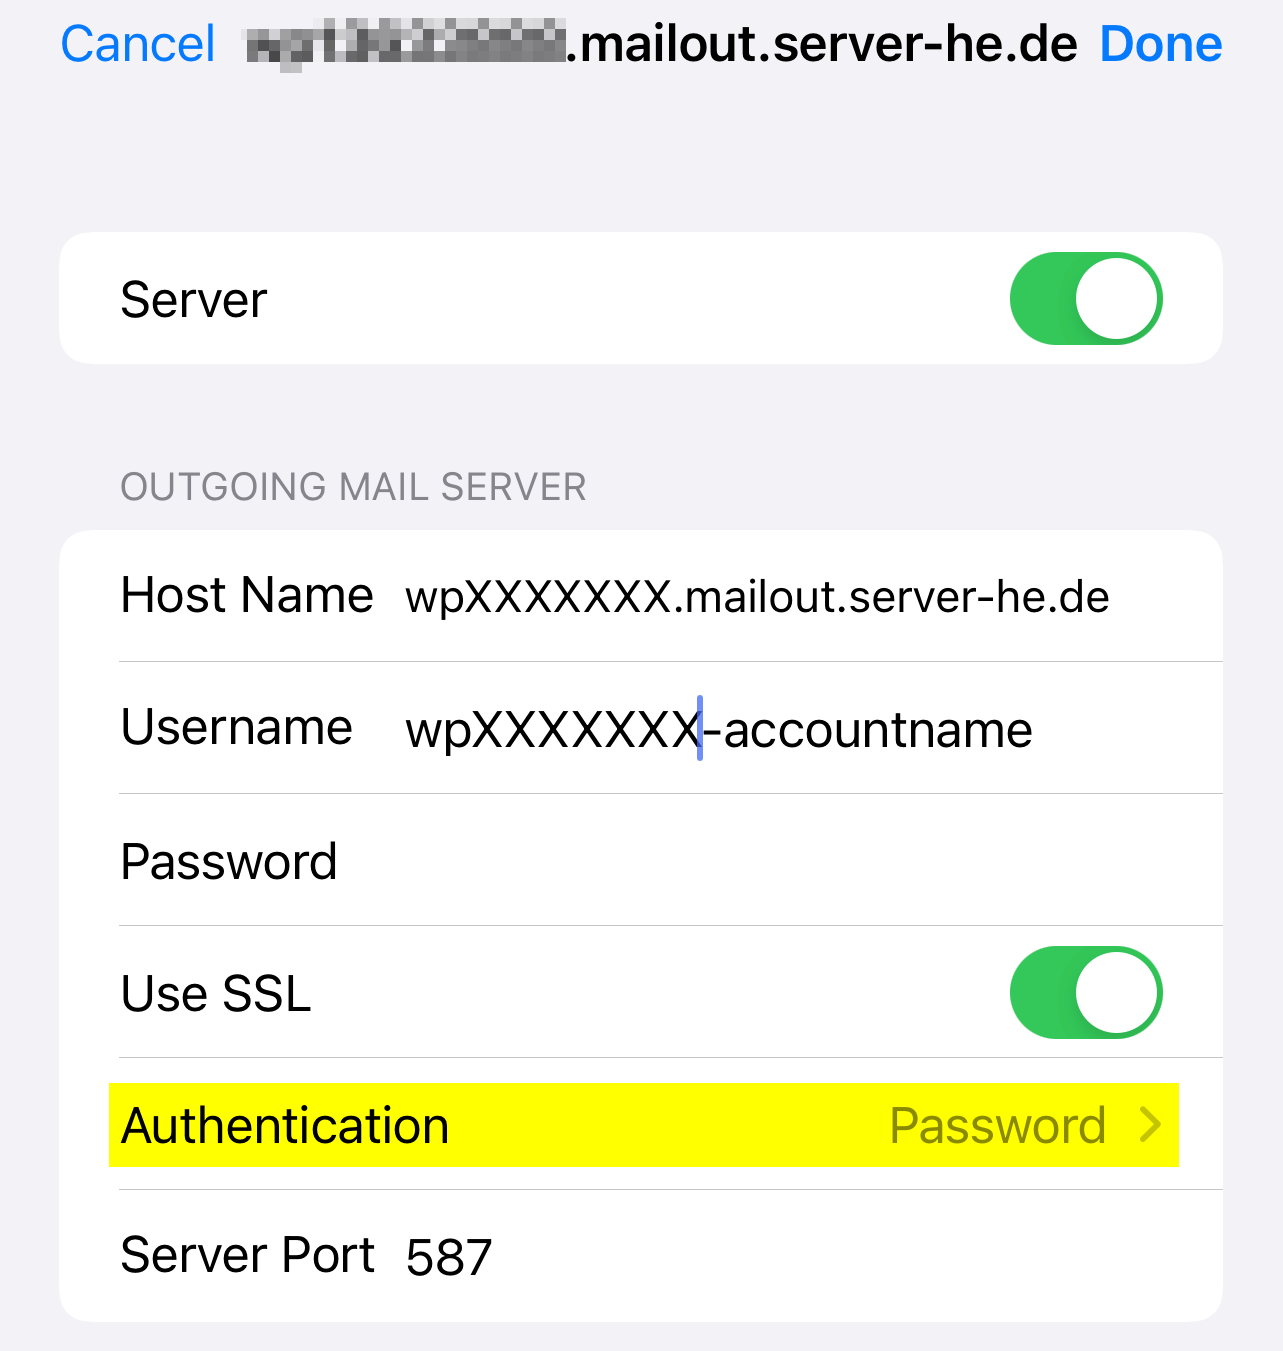
Jetzt können Sie die Einstellungen für ausgehende Mails überprüfen und ggfls. korrigieren. Eine häufige Fehlerquelle ist hier beispielsweise eine falsche Einstellung unter "Authentifizierung". Dort muss "Passwort" eingestellt werden und das Feld "Benutzername" muss mit dem E-Mail-Kontonamen ausgefüllt sein:
- Hinweis: In einigen Fällen kann es dazu kommen, dass nach dem Einrichten eine Fehlermeldung zu sehen ist und das E-Mail-Konto nicht funktioniert. Starten Sie bitte das Endgerät einmal neu und versuchen dann erneut, auf das E-Mail-Konto zu zu greifen. Sollte dies nicht helfen, versuchen Sie das E-Mail-Konto zu entfernen und nochmal neu einzurichten.
Sollten Sie trotz dieser Informationen weiterhin Probleme haben, wenden Sie sich bitte an unseren Support.English version:
In these instructions we explain how you can integrate the e-mail addresses previously set up in the KIS on your iOS device.
What will be set up?
IMAP with TLS encryption ⇒ recommended!
Which iOS version of does this guide work with?
iOS 15 or higher
Quick start Guide:
To set up a mail account you need the following information:
→ Incoming mail server: wpxxxxxxx.mail.server-he.de (Note: The placeholder "XXXXXXX" corresponds to the ID of your contract)
→ Recommended encryption: TLS
→ Outgoing mail server: wpxxxxxxx.mailout.server-he.de (Note: The placeholder "XXXXXXX" corresponds to the ID of your contract)
→ Recommended encryption: TLS
→ Username: wpxxxxxxx account name* (Note: The placeholder "XXXXXXX" corresponds to the ID of your contract)
→ Password: (your self-defined password)
*You assigned the account name yourself in the KIS when you set up the e-mail account.
Detailed instructions:
Setting up an additional e-mail address
If you have already set up an email address on your iPhone/iPad, please follow these steps first. If you have not yet set up an email address, you can skip these steps here and go directly to the Initial Setup section below. These instructions may differ slightly from older iOS versions:
Please open the "Settings" of your iPhone/iPad. There you tap on "Mail" and then on "Accounts":
Next, please tap on "Add Account" and then on "Other":
Now please tap on "Add Mail Account":
Initial Setup
If you start the Mail app for the first time and no email address has yet been set up, the following dialog appears. Please select "Other" there:
Now enter your details and then tap on "Next":
Now enter your access data in the fields marked in yellow. ATTENTION Please fill in the "User name" and "Password" fields in the "Server for outgoing e-mails" section, even if it says "Optional". Tap on "Next" in the top right corner:
If you have entered all the access data correctly, you can now tap on "Save":
This completes the setup of the email address in the iPhone/iPad.
Check mail settings
Please open the "Settings" of your iPhone/iPad. There, tap on "Mail" then "Account" and then on the relevant account:

Now tap on "Account":
- Note: In some cases you may see an error message after setup and the email account does not work. Please restart the device once and then try to access the email account again. If this does not help, try removing the email account and setting it up again.
If you still have problems despite this information, please contact our support.
Now you can check the settings for incoming mails and if necessary correct them. If you have problems sending emails, please tap on "SMTP" as shown in the screenshot:
Here please tap on the entry under "Primary Server":
Now you can check the settings for outgoing mails and if necessary correct them. A frequent source of error here is, for example, an incorrect setting under "Authentication". "Password" and "Username" (it's not optional, but required) must be set there: